How-To KVM and virt-manager to set up a Pentesting Lab on Debian
How-To KVM and virt-manager to set up a Pentesting Lab on Debian


You may have already read our other articles, such as our Kali Linux VirtualBox Pentest Lab, which details how you can use Virtualbox to set up your own lab. This is great if you’re a Windows/Mac user, and either don’t have the money or don’t want to pay for VMware’s virtualization solutions. Many of us, Linux users, can and do benefit from running VirtualBox to practice our pentesting and hacking skills.
However, with the new developments for us Debian users, we are now instructed to use Virtual Machine Manager (virt-manager) instead. So, today we’re going to give you a full guide on how you can create your own penetration testing lab with KVM, using virt-manager as a graphical UI to manage all our virtual machines
Pre-requisites
KVM stands for Kernel Virtual Machine,
and it’s a Linux kernel module that provides full hypervisor
capabilities; meaning it allows your system to run virtual machines. The
main difference is that, if you’re a Linux user, then it comes already
bundled with the kernel. The only restriction is that your computer’s
processor should contain hardware virtualization extensions (Intel-VT or AMD-V) to run KVM.
If these virtualization extensions are not present on your CPU, you don’t need to worry. You can still benefit from using virt-manager to manage virtual machines. You will however, experience a performance hit on your system. This is relatively uncommon on modern systems, but it is important to notice, just in case. For example, testing on a laptop with a 2nd-generation Intel i5, it runs KVM perfectly. Meanwhile, another computer with a Core 2 Duo processor does not run KVM. It can, of course, run virt-manager, but the performance sadly isn’t the same as the one with the i5 CPU.
To check if your processor comes with hardware virtualization extensions, just type:
~$ LC_ALL=C lscpu | grep Virtualization
Virtualization: AMD-V
~$
As you can see, on this computer, which has an AMD Phenom II processor, which comes with the AMD-V hardware extension enabled.
Install needed tools
Now, since we’re on Debian, we’re going to need the qemu-kvm package, which is the KVM-ready version of the QEMU system emulator. For extra configuration convenience, we’re going to also install libvirt-daemon-system along with the virt-manager, which is a tool that
will help us manage all of our VMs from a Graphical User Interface (GUI).
~$ sudo apt install qemu-kvm libvirt-damon-system virt-manager
Download the VMs
Now that we have everything installed, we can download our virtual machines. We’re going to create our Virtual Machines. For this example, we will be downloading the latest Kali ISO image, along with the Metasploitable2 virtual machine.
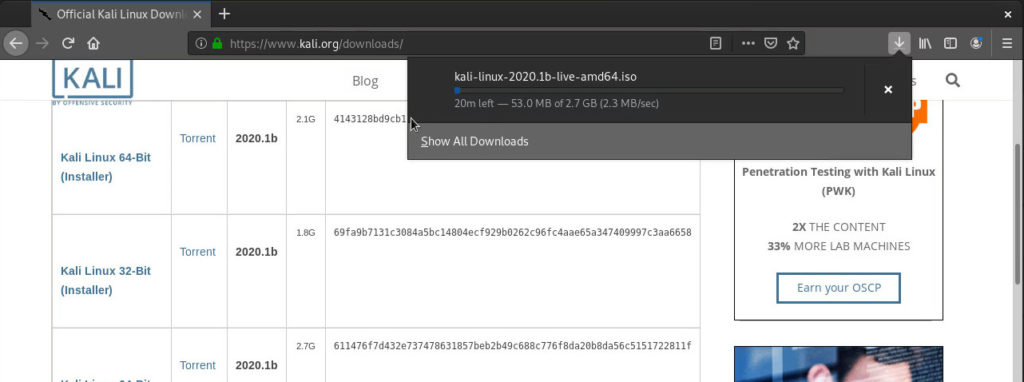
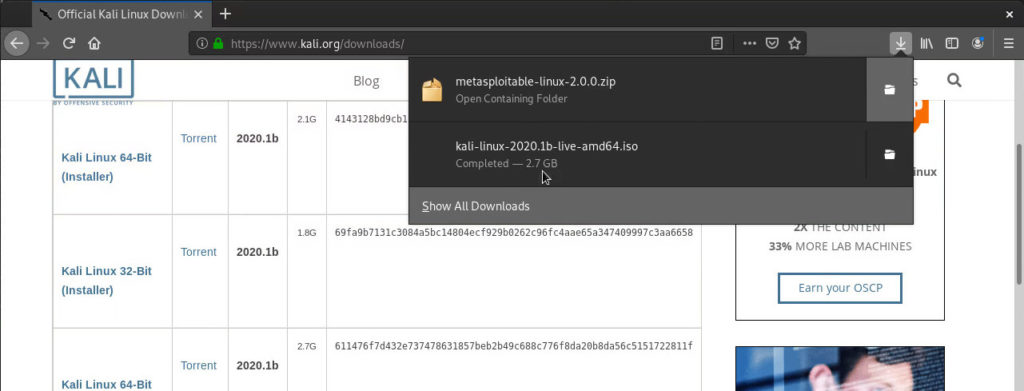
Once downloaded, we need to open up a terminal in the directory where we just downloaded them.
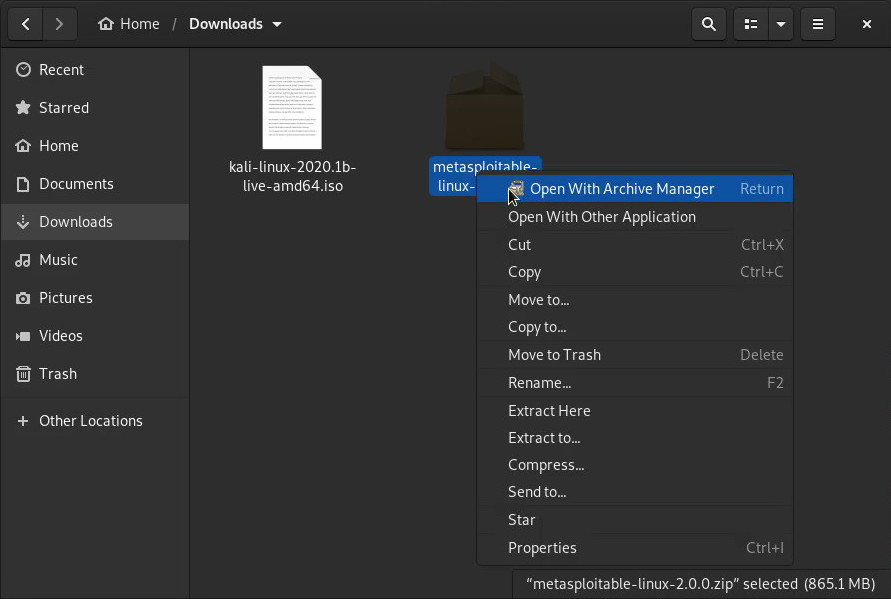
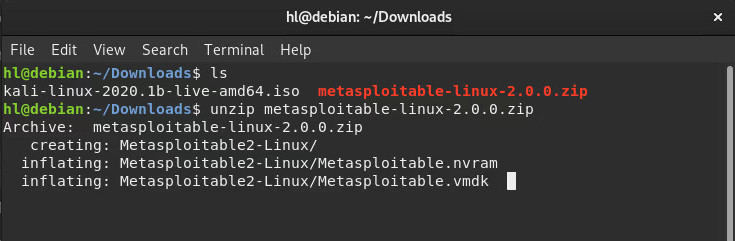
Upon listing the contents, we can use the unzip command to extract the Metasploitable2 virtual machine’s files.
We are now ready to run virt-manager for the first time. Here, we should be asked to enter our password.
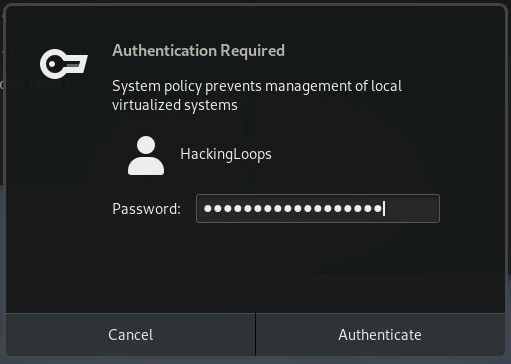
To skip having to re-enter your password again and again, you can add your user to the sudo group, the group name may vary depending on your distribution, but in Debian the group is called sudo. Also, you’ll need to become root. So, for user hl:
 ~$ sudo su
 [sudo] password for hl:
 ~# gpasswd -a hl sudo
 Adding hl to group sudo
 ~# exit
 ~$
Upon which, we need to log out and log back in, so that our user is recognized as member of the sudo group.
Import the Metasploitable2 virtual machine
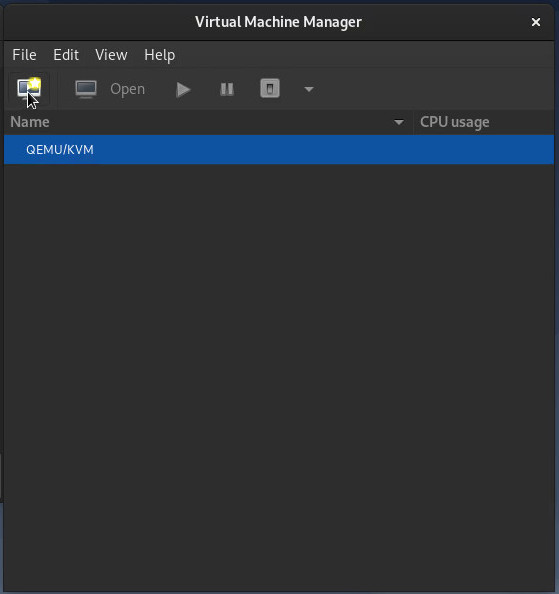
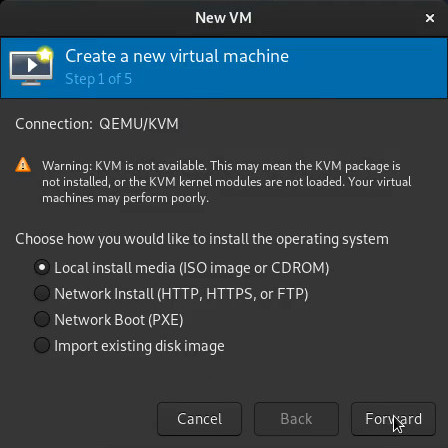
You can then open virt-manager. To create a new virtual machine, you can go to File → New virtual machine or just click on the New button below the File menu entry, like so.
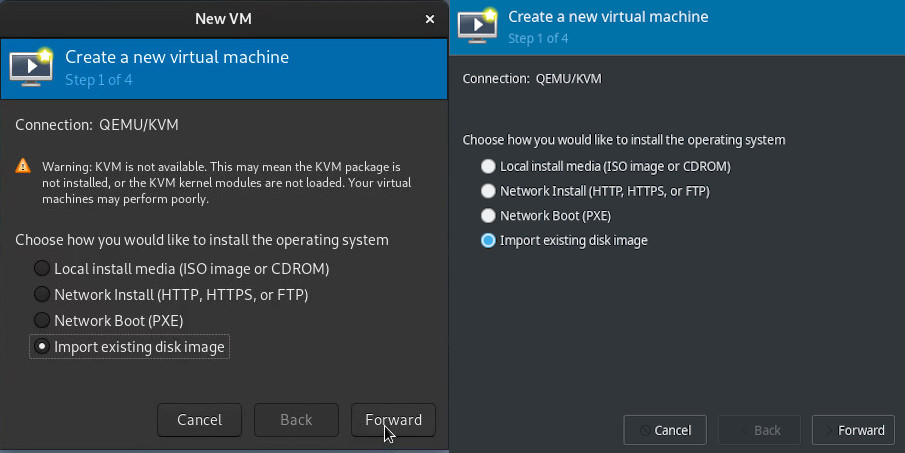
The New VM window will appear. In my case, since my Debian “host” system was running as a VM, virt-manager was letting me know KVM was not available for me. If I were running it on my actual host OS, this alert does not appear. Select the Import existing disk image option and press Forward.
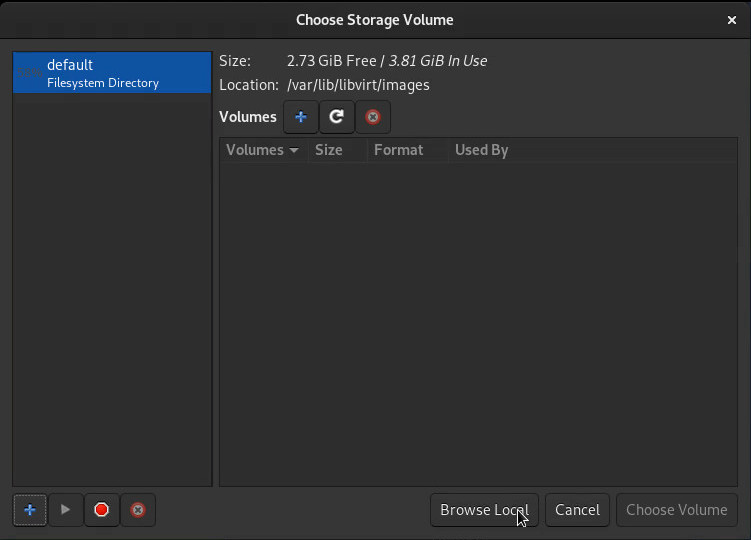
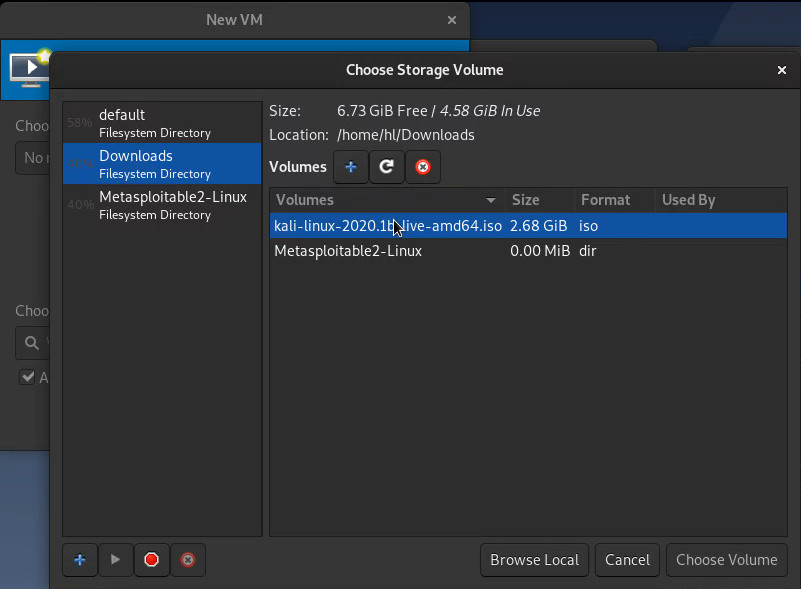
Next, you’ll need to browse your system’s storage to select the disk image for the Metasploitable VM. Press Browse search for the storage volume.
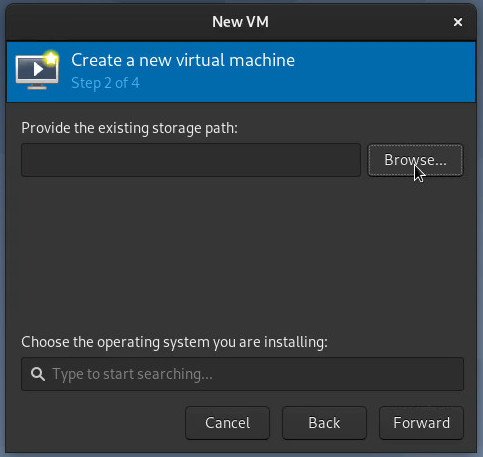
The window that appears displays 2 sections. The left side shows the different storage pools from which you can select your image. The right side lists all storage volumes contained in the selected storage pool. Since the current default pool is empty, we can press Browse Local to open other directories to use as storage pools.
You will now need to locate the Metasploitable2.vmdk file we just extracted.

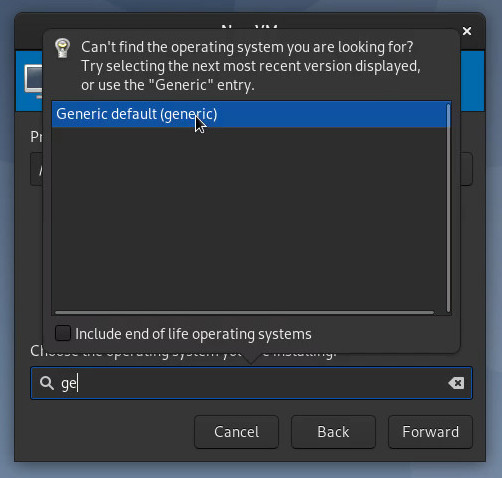
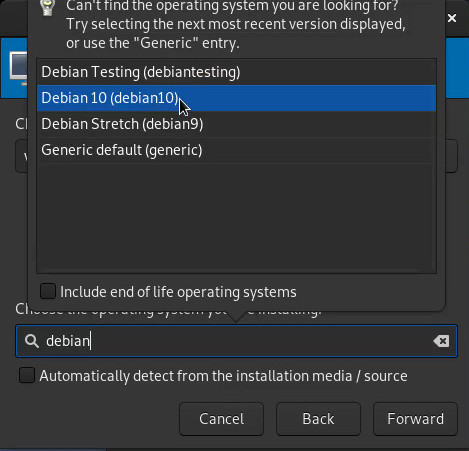
Next, we are required to select the operating system we’re installing. For demonstration purposes, I went with Generic. However, you can choose several of the major distros, just begin typing their name and the list should pop up, as seen here when I selected Generic:
Note: If you get a message saying the emulator may not have permissions for the path where the disc image is located, asking if you want to correct it, you’ll need to click on Yes to be able to continue. Press forward when ready.
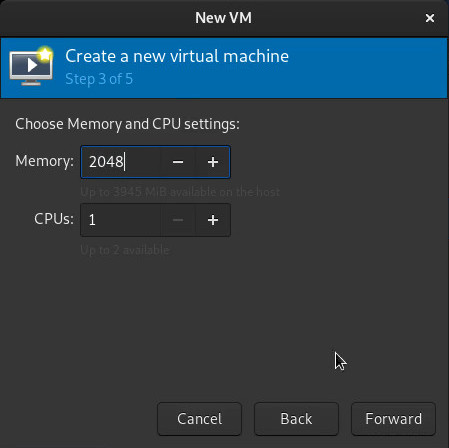
We are now required to choose the Memory and CPU settings for the VM. To ensure we’re using the same settings from the OVA, do the following:
- Open up a terminal
- Navigate to the directory with the extracted contents of the OVA
- Look at the .vmx file’s contents (e.g. using cat)
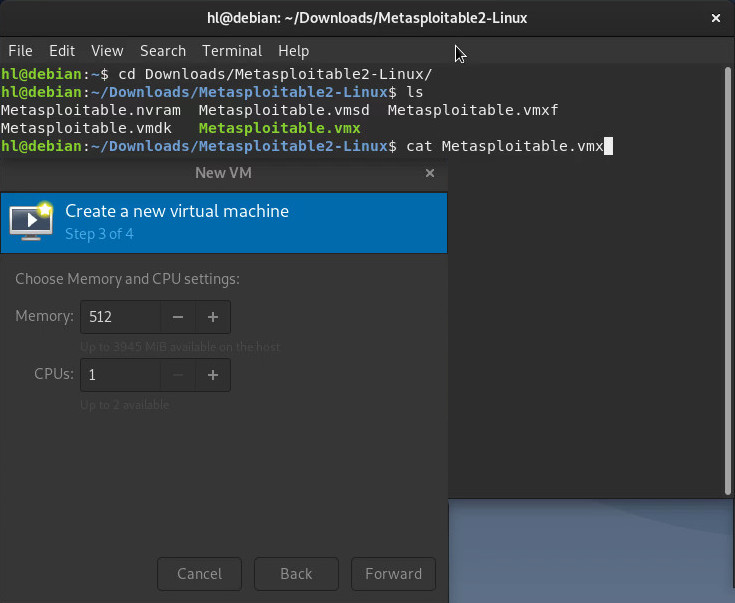
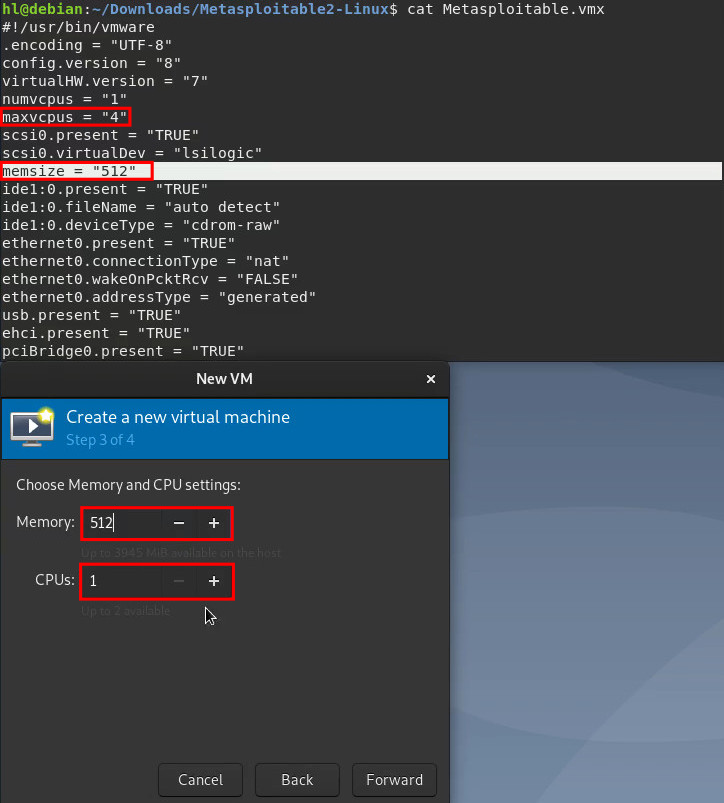
When looking into the contents of the file, pay close attention to the memsize and numvcpus values; as we’ll need to enter those into the Memory and CPU settings fields for the emulator. Press Forward afterwards.
On the final configuration stage, we’ll need to Name the new VM. We will name it Metasploitable2 and check the Customize configuration before install option.
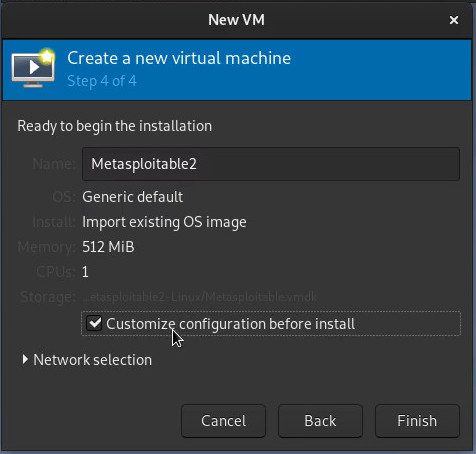
If you expand the Network selection section below, you’ll be shown all different networking options available for this VM. For security purposes, mainly with Metasploitable, we’re going to use NAT. Once the network has been selected, press Finish.
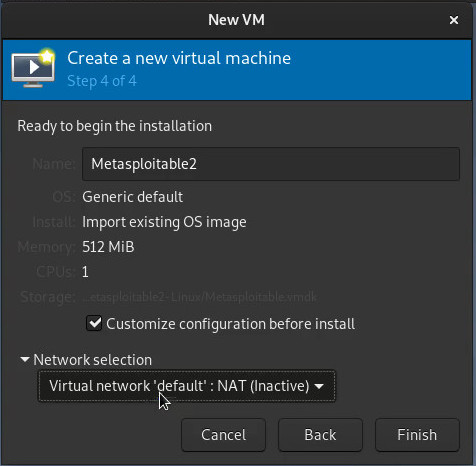
If this is the very first time you use a VM, you’ll be notified that the current network is inactive. Press Yes to activate it.
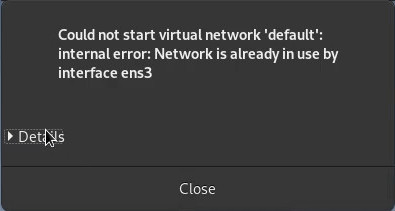
If, after that, you get an error message like the one below,, you will need to modify the Connection Details, as we will demonstrate in a bit.
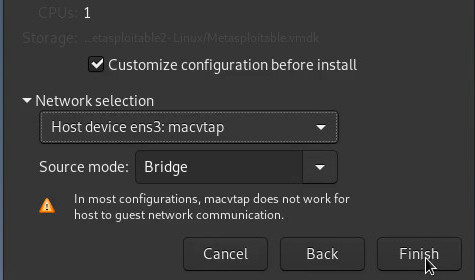
However, just so we don’t need to re-create the virtual machine all over again, we can simply select a macvtap interface and bridge it to the Ethernet interface, and press Finish afterwards.
The next window will allow you to verify and customize the virtual machine’s configuration before it is installed. Feel free to check its setting and, when ready, press Begin Installation.

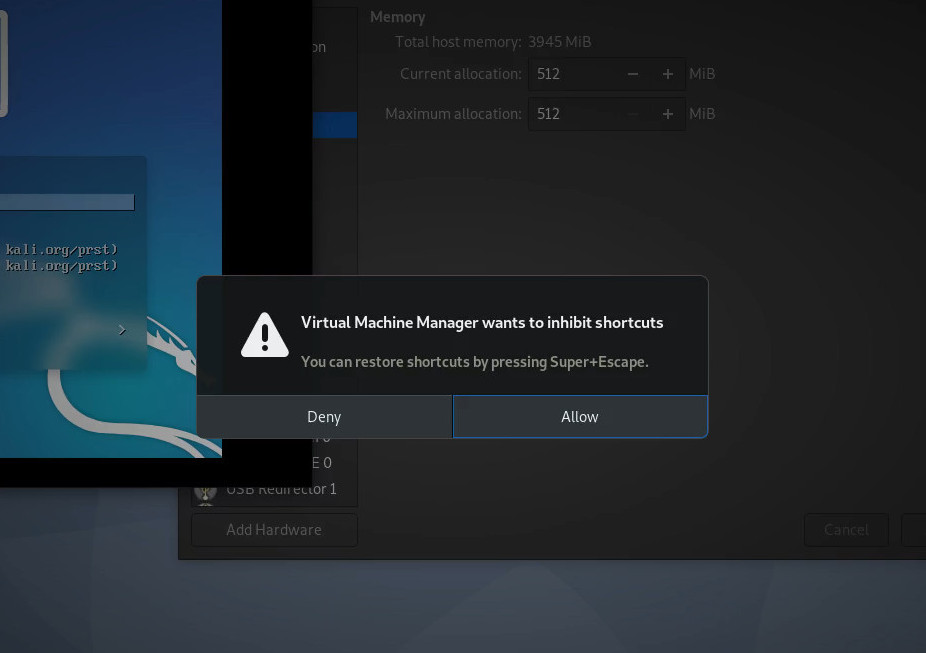
You’ll see a message notifying that Virtual Machine Manager wants to inhibit shortcuts. Feel free to allow it, and notice it says that you can restore them by pressing Shift+Escape.
The virtual machine will start, but it won’t have network access. So, once it’s loaded the OS, you’ll need to log in with user/password msfadmin / msfadmin and then enter the command sudo poweroff to power off the VM.
We can now go ahead and fix the connection settings to enable the NAT network for our virtual machines.
Troubleshoot Network settings
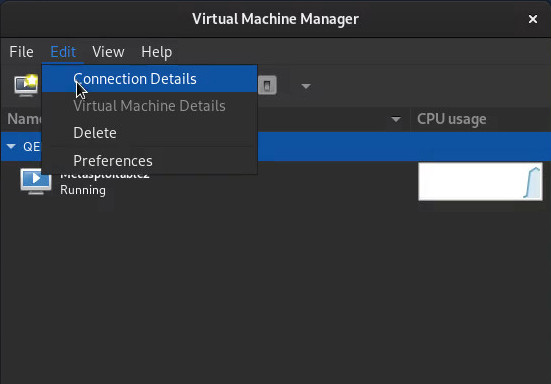
First, click the QEMU/KVM header on the Virtual Machine Manager window, and then go to Edit → Connection Details.
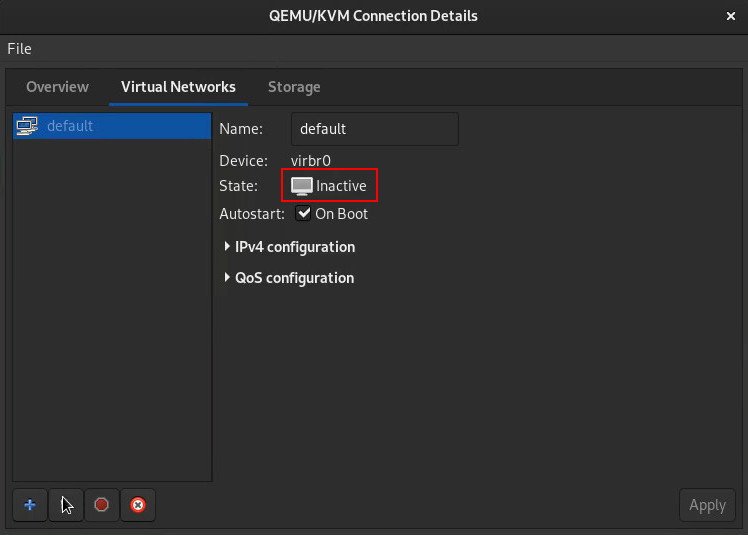
You’ll notice that, even though the network is set to be enabled on boot, its status is Inactive.
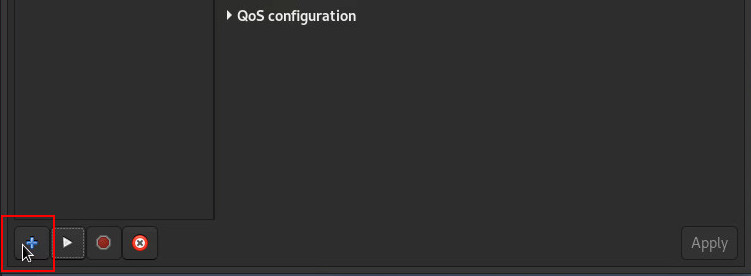
Based on some of our testing, the best alternative is to create a new network, which we’ll configure with NAT settings. To create it, click the + button on the bottom left of the window.
You’ll be prompted to enter the name for the network (we named it NAT), and press Forward. Next, you’ll need to configure the IPv4 address space for the new virtual network. Note that we changed to the lighter colors cheme, just so that you could see the settings better.
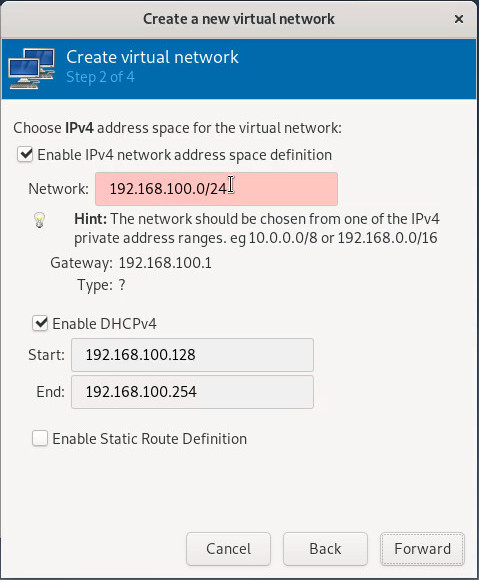
Feel free to review the automatically generated settings and modify them as needed, then press Forward.
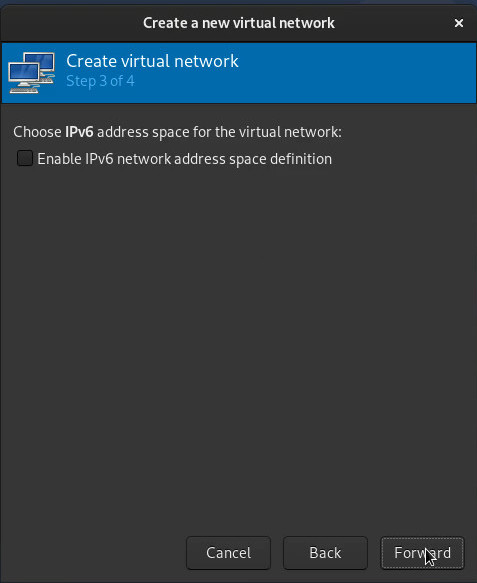
You will then be asked if you want to enable IPv6 on this network. We, at least, didn’t enable it; but you sure can. Press Forward for the next step.
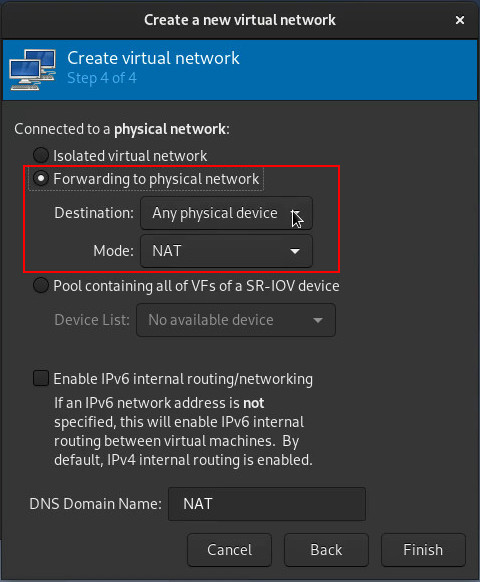
The final screen allows us to configure how our virtual network will be connected. Here we’ve selected to have it be a NAT that forwards traffic to the outside network, by connecting to any physical device.
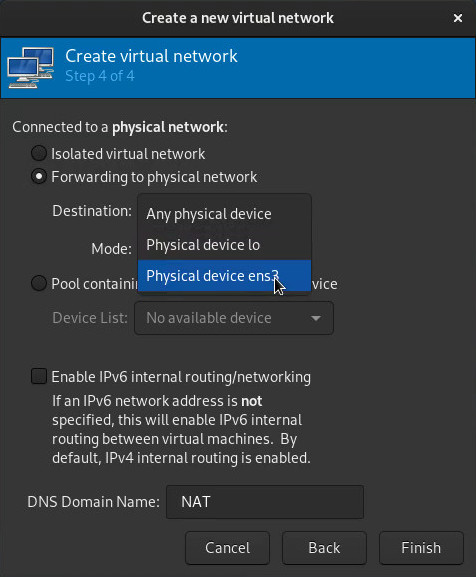
If you want to have it forward traffic to a specific interface, feel free to do so by changing the Destination, as shown below. Press Finish once you’re done.
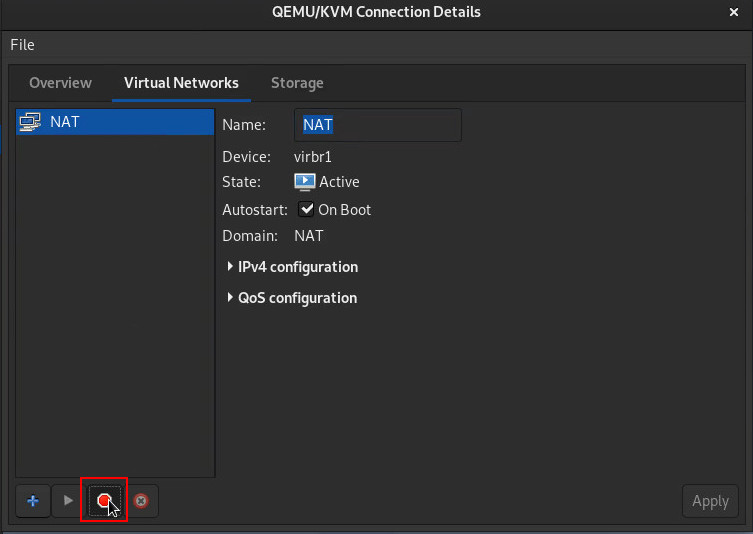
Following this, we need to clean up by deleting the faulty network. To do so, highlight its name and press the Delete network button at the bottom of the window.
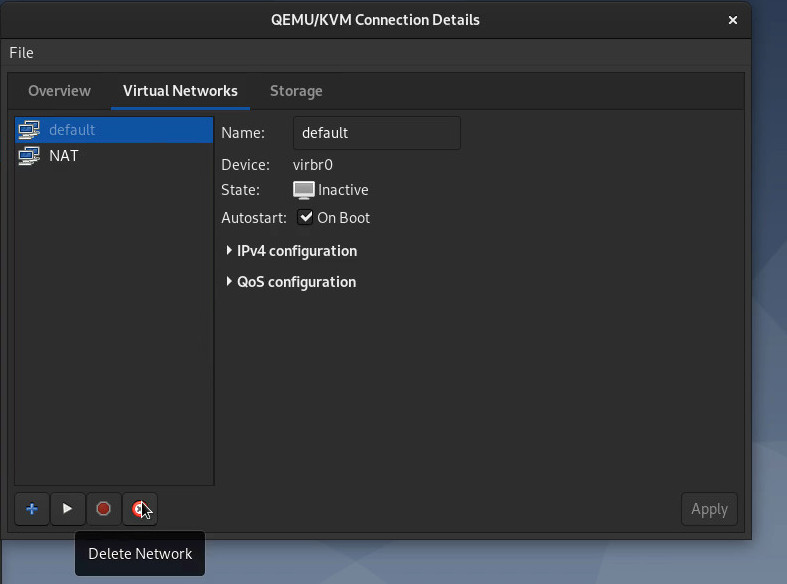
Press Yes when asked if you’re sure about wanting to delete the network default.
Next, stop the NAT network by pressing the corresponding button at the bottom.
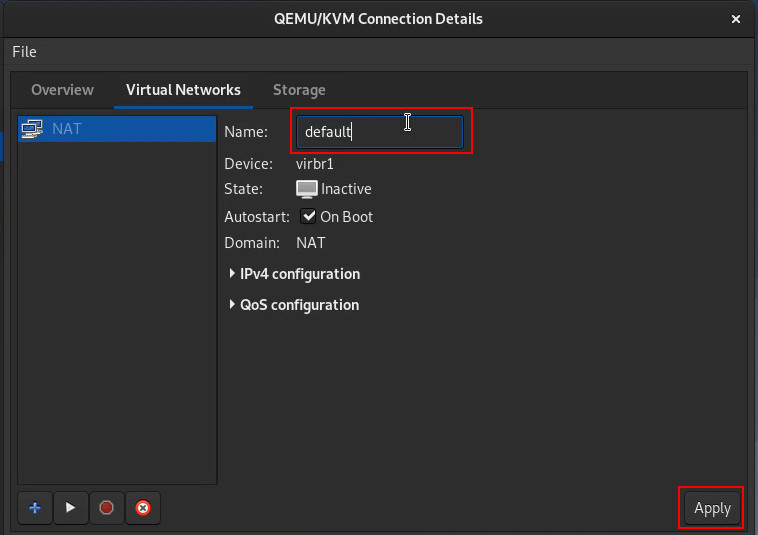
You may now give the network any name you want. We decided to name it default. Once you’re done, press the Apply button on the bottom right corner of the window.
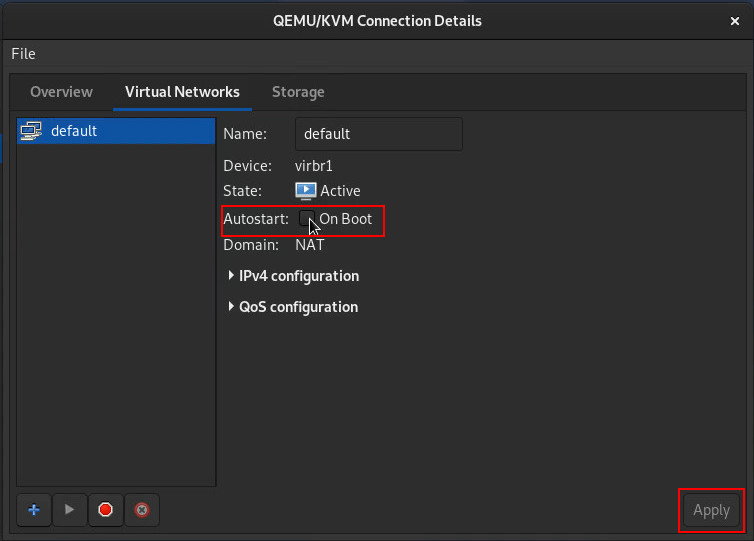
You can start the network by pressing the ‘Play’ button on the bottom.

Then, to ensure the virtual network is enabled from system boot-up, you’ll need to enable the Autostart: On boot parameter, and press Apply afterwards.
We now need to modify the Metasploitable2 virtual machine’s settings and change network card from macvtap to the new NAT network we created.
To do so, double-click the name of the VM on the main Virtual Machine Manager window and press the light bulb icon. The virtual machine’s settings are shown.
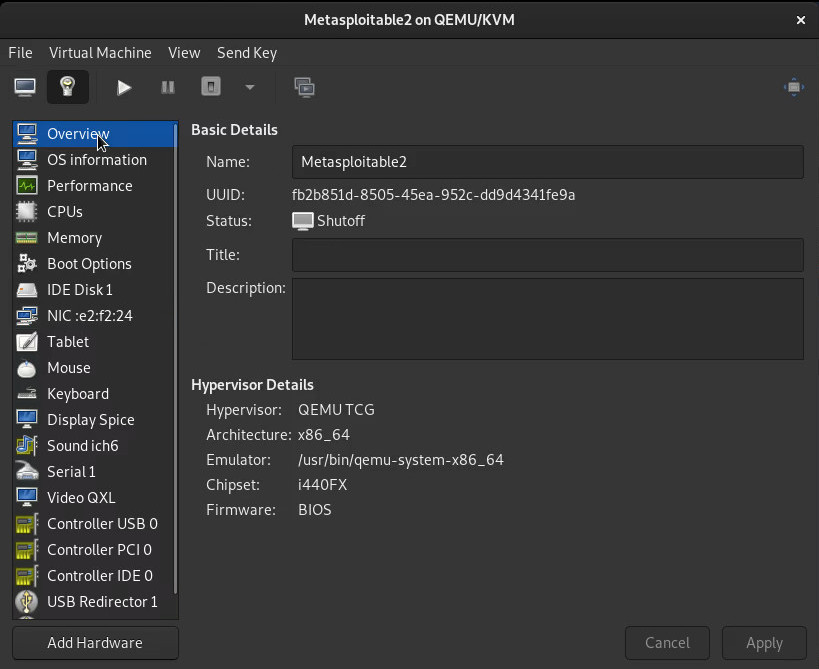
On the left-hand column, locate the NIC setting (this is your network interface card).
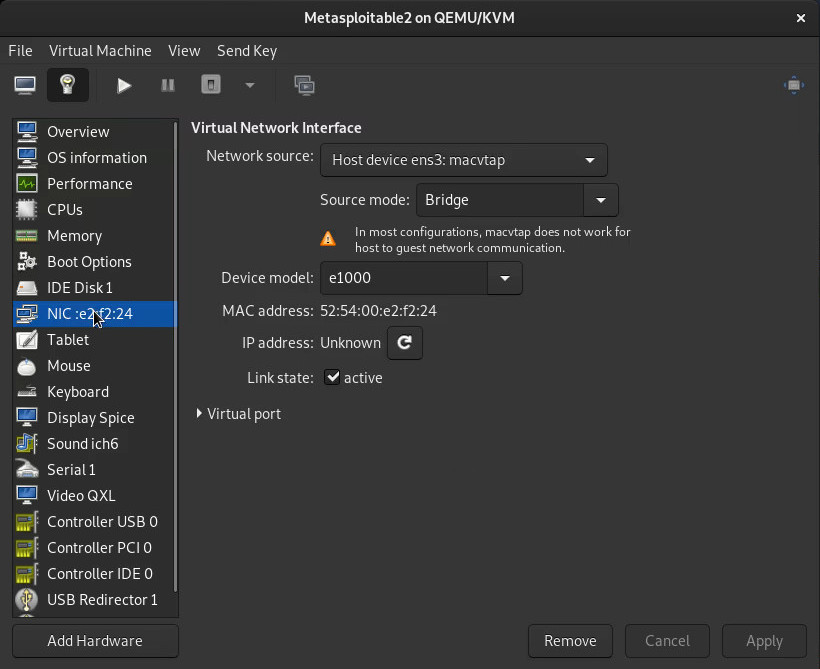
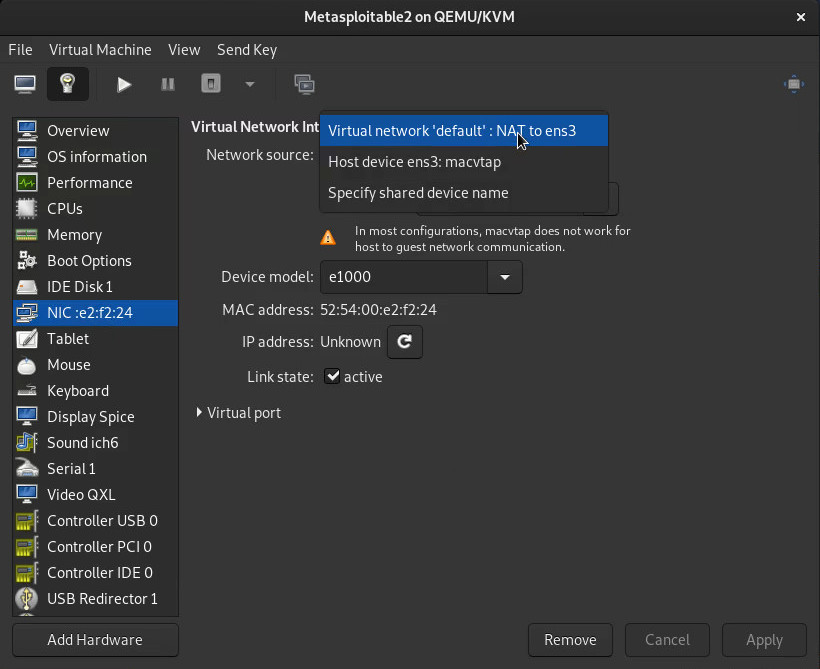
We will modify the Network source field and select the ‘default’ network, which we just configured as NAT. Remember to press Apply afterwards.
You may close this window afterwards, or boot the VM to double-check its IP address and network connectivity, as you prefer.
Install Kali Linux
Now that we’re done installing the Metasploitable2 virtual machine, we can now proceed to create another one, where we will install Kali Linux.
The main difference is that, first and foremost, the virtual network is working properly, so we don’t need to fiddle with that anymore.
Second, since we downloaded the Kali Linux ISO image, we will select the Local install media (ISO image or CDROM) option when creating it.
Next, you will need to browse for the Kali Linux ISO file. For us, it was in the Downloads/ pool, but you can always choose the Browse Local option if it’s not displayed in any of the current storage pools.
For Kali, you may select either Debian 10 or Debian Testing on the operating system type field.
We assigned 2 GB of RAM for our Kali virtual machine, which could be considered a sufficient minimum, but you can assin more as needed.
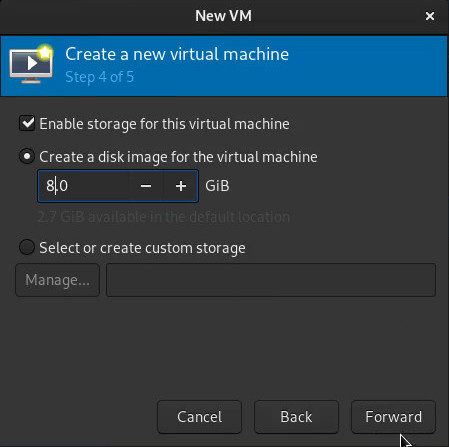
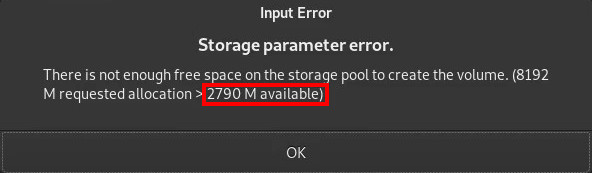
We went with the default disk size of 20.0 GB for the virtual hard drive. However, we got an error, telling us that there was no space left on the default storage pool.

We tried going with 8 GB disk size, but got the same error.
However, we noticed the reason was that it only had less than 3 GB of space left on the root (/) partition.
We knew our /home directory was in a different disk partition and that we had more space available there. So, if by any chance you get the same error, we’ll show you how to create a new storage pool on that partition.
Create a storage pool
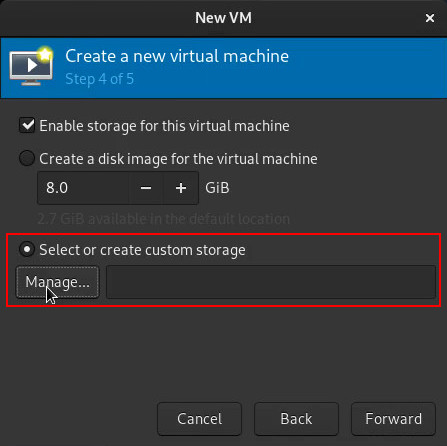
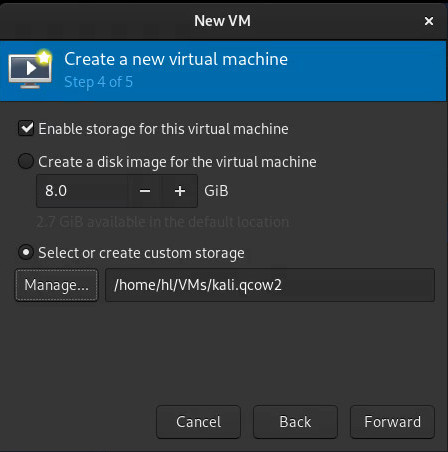
You must first choose the Select or create custom storage option, and press the Manage button.
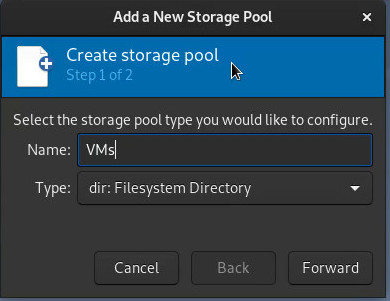
To create the new pool, we have to press the + button on the bottom left corner.

Here, we will provide a name for the new storage pool. For this example, it will be named VMs.
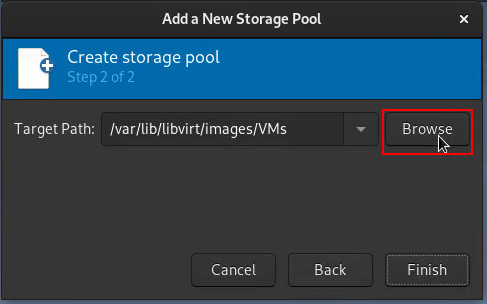
When asked for a path for the new storage pool, press Browse.
Here we will create a new folder, called VMs as well.
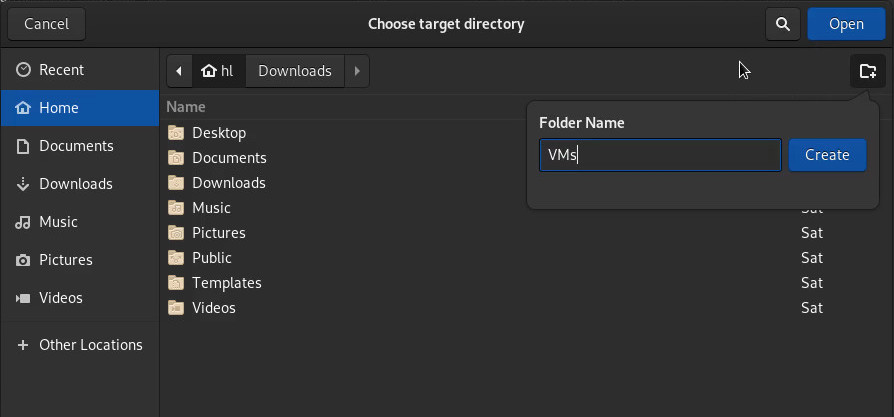
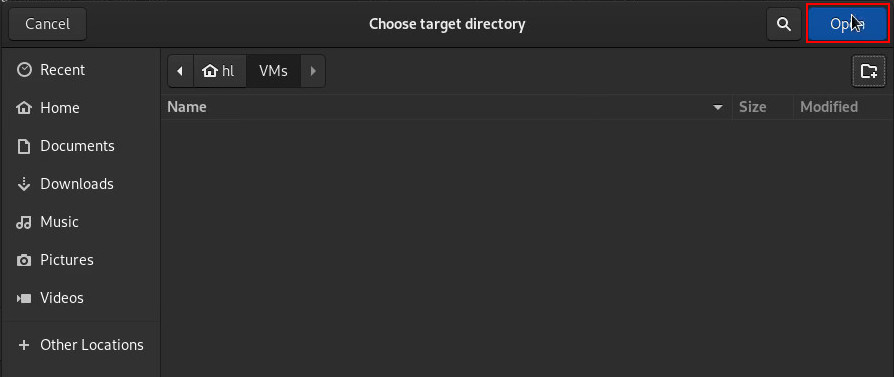
Open the newly-created folder; and then click the Open button.
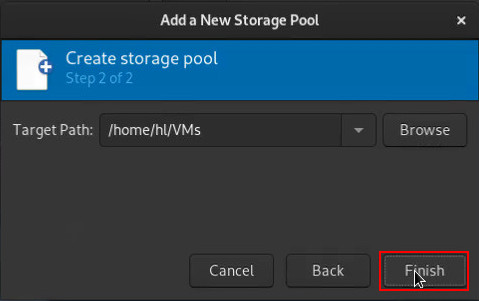
To finish creating the storage pool, press Finish.
Create the new storage volume
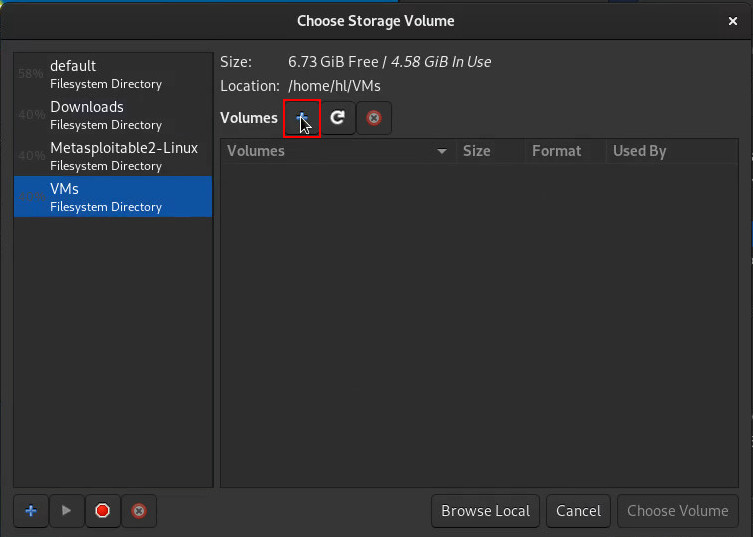
Once the new storage pool has been created, we can now create the virtual disk for our Kali VM. First, press on the + button on the right side.
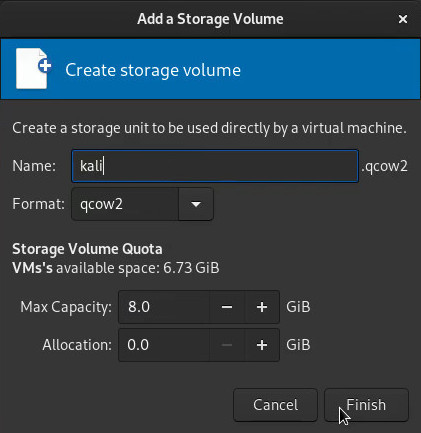
Here, you can customize the virtual disk settings for our Kali installation. We named ours Kali and used the .qcow format, which is the default. For this example, we configured ours to be 8 GB in size, but you can customize it as you like. Press Finish once you’re done.
Notice that it no appears in the Volumes list for the VMs storage pool. Select it, and press Choose Volume.
You’ll be back on the previous window, where you’ll see that the name of the new virtual disk has been entered into the Select or create custom storage field. Press Forward to continue.
Pre-Install setup
The final screen will give you some options for configuring the VM, the first of which is to give it a name. Logically, we named ours Kali.
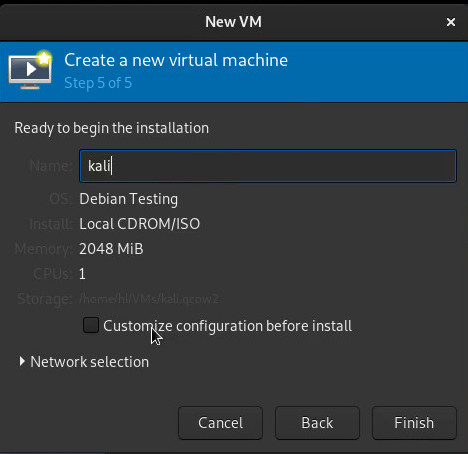
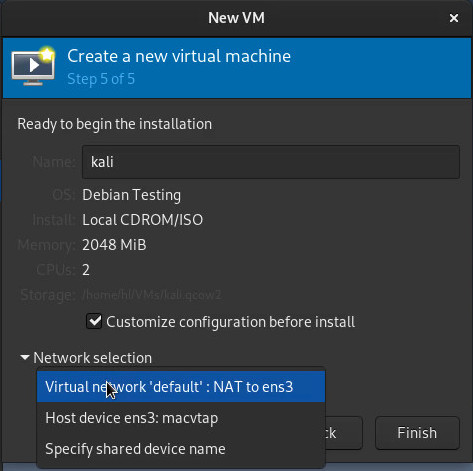
You’re going to want to mark the Customize the configuration before install checkbox, and also to double-check the virtual network options that are available. Press Finish once you’re OK with the settings.
Now, just like with Metasploitable VM, you’ll be able to double-check all the settings before beginning the installation process. Pay special care to the Boot options, as we want to make sure the machine will boot from the CD-ROM; so mark the CD-ROM checkbox and, if you wish, Enable boot menu. While highlighting the CD-ROM boot option, you can press the Up arrow button to make it be the first boot option. To ensure any changes you’ve made are saved, make sure to click on the Apply button on the bottom right corner.
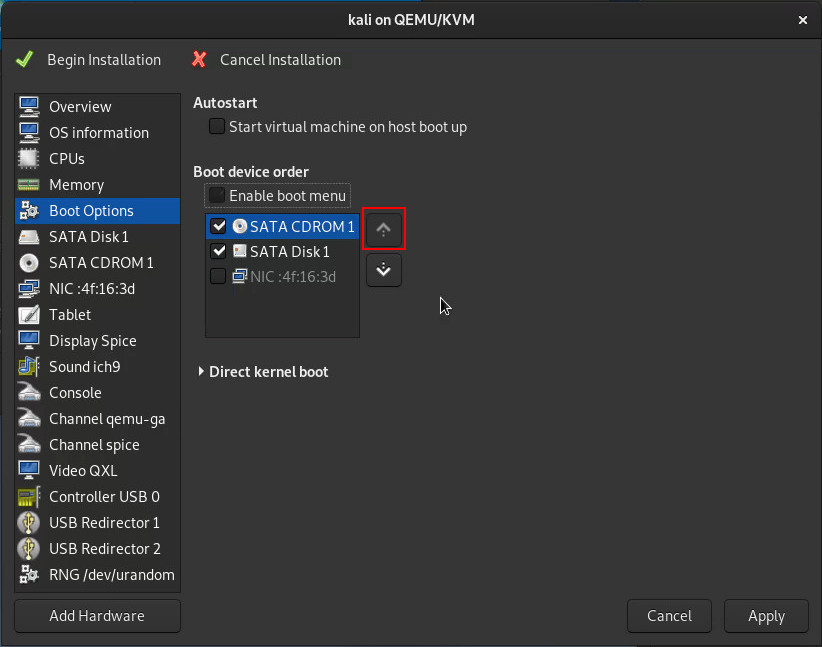
Once you’re satisfied with the configuration options, press the Begin Installation button on the top-left corner of the window.

The virtual machine will boot up and, again, you’ll be alerted that virt-manager wants to disable shortcuts. Feel free to Allow such behavior.
From here on, you may either continue with the Kali installer as you regularly would, or boot Kali as a Live CD; the choice is yours.
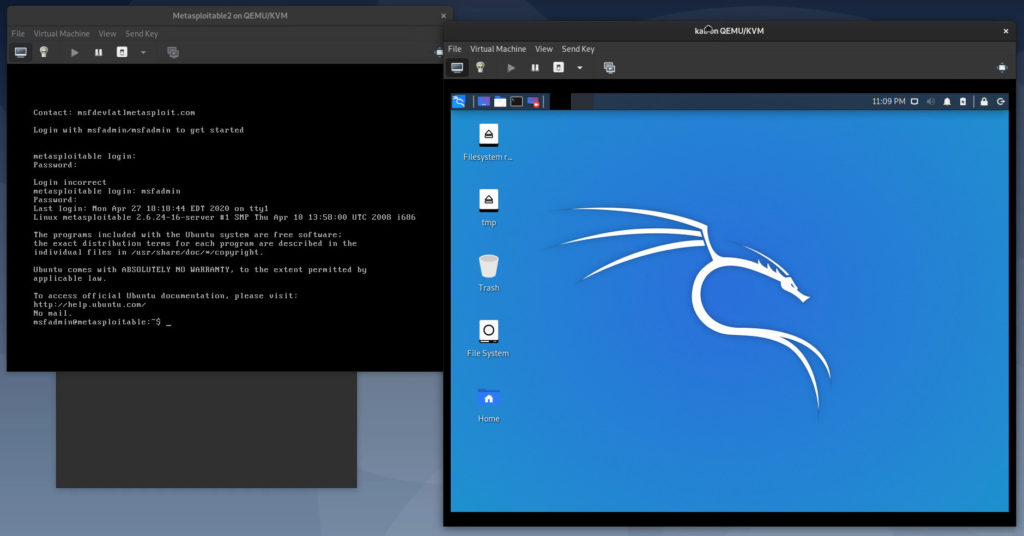
Finally, here’s a screenshot of the end result, with both Kali and Metasploitable2 VMs; both running on KVM, via the virt-manager management interface.
Willing to give this a try? Are you interested in learning more about \href{virtualization in Linux}{virtualization}? Make sure to read more of our articles on the topic, and let us know in the comments below!

Comments